Overview
When migrating to Rewards, only users who are active in your Jive community, completed quests, and badges acquired are transferred to Playbox. Basically, user data from the Status Level gamification are migrated. However, badges in the oldest version of Jive gamification do not provide enough options that will match the number of available quests and events that you can set up in Playbox.
This article demonstrates the steps on how you can customize badges for Jive Playbox, also called Jive Rewards.
Process
To customize a badge, you must be logged in as Administrator in order to proceed:
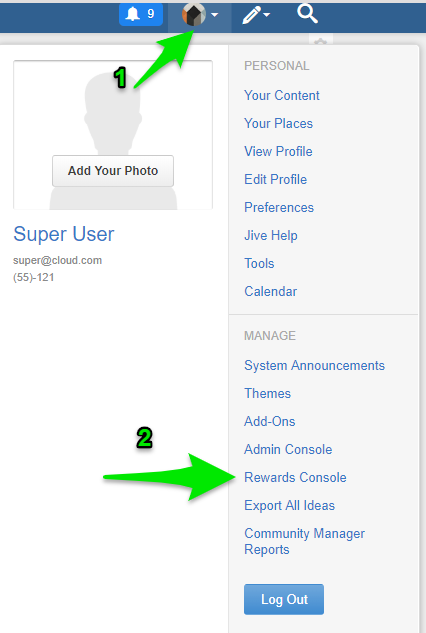
- Go to your Avatar menu.
- Click on the Rewards Console from the dropdown menu.
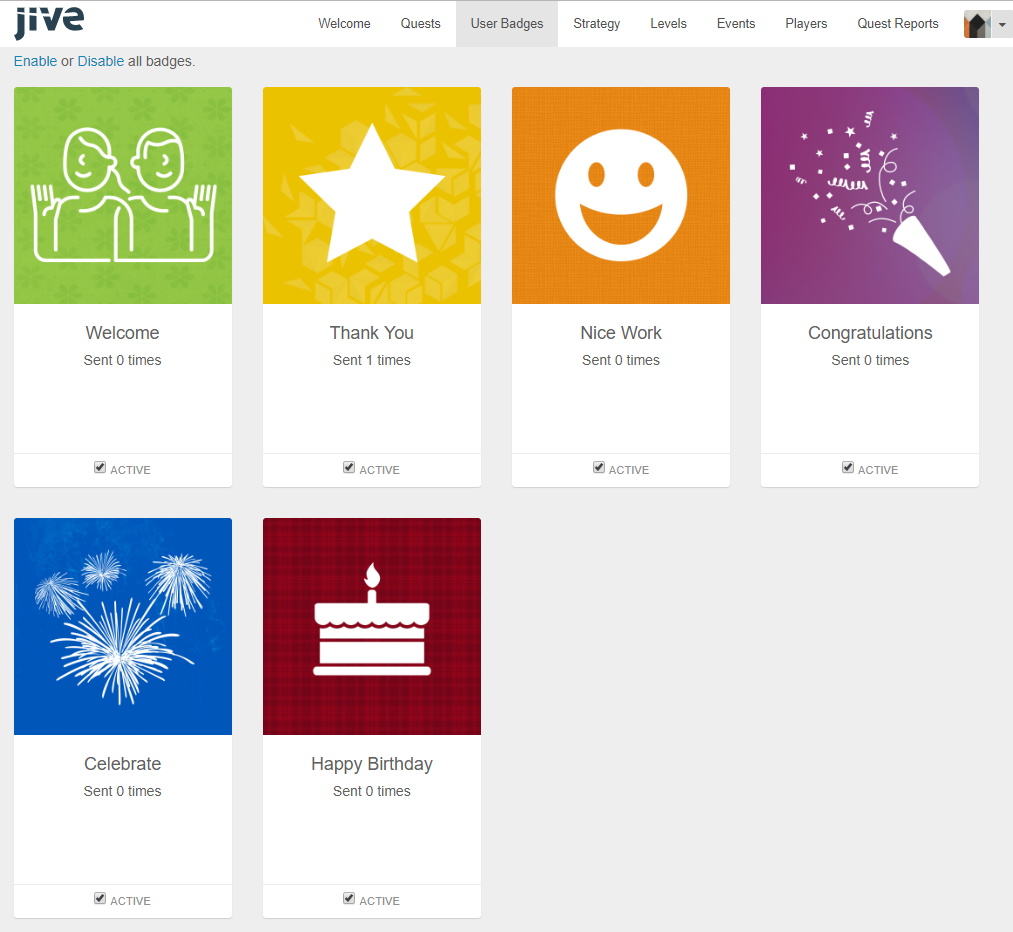
- From the Rewards Console, go to User Badges.
- Select a badge to open the badge settings page.
- Under Badge name, select a name or select Add a custom name and type the name for the badge.
- In the Default message field, specify the default message to be sent with the badge.
- For non-English badge names, translate the name (if you used a custom badge) and the default Jive Playbox text to the community languages by following these steps:
- Click Translation under the badge image.
- On the Translation page, select the language you want to add.
- Enter the default title and message for this badge in the language you selected.
- Click Save Changes.
- Under the badge's image, click Change Badge, then upload a new image for the badge.
- Click Save Changes to update the badge.
Confirmation
Jive Playbox User Badges can be configured to some extent. Any changes you made will only affect badges that will be awarded in the future, after the time that changes were saved. Already awarded badges will not be affected by these changes.
If you have successfully customized the badges, they should be displayed in the User Badges tab of the Rewards Console.


Priyanka Bhotika
Comments