Overview
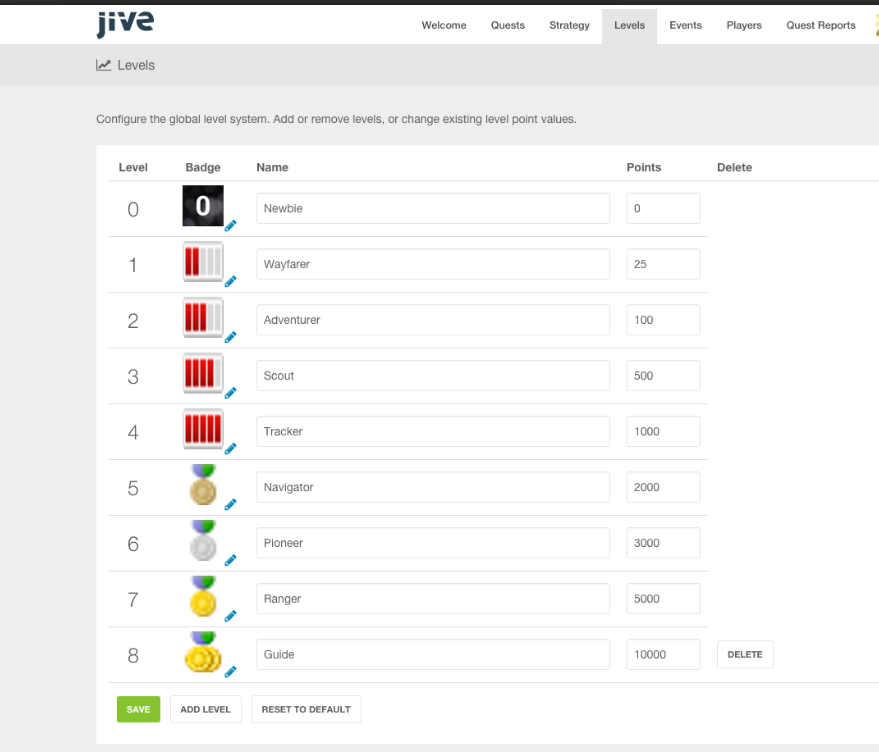
Jive Rewards includes a standard set of levels that motivates community users and provide meaningful information about their engagement level based on typical community usage. You can review and configure the levels in your community on the Levels tab in the Rewards Console. Points required for reaching each level are based on the events defined in the Events tab.
Levels are preconfigured and do not require setup, unlike the other Rewards components. However, you can change the standard levels and add your own names and badges.
In the user interface, each user's points total and level are shown at the top of the profile page. The level also comes with a specific badge. Below is an example profile in Level 0.
This article demonstrates the steps in customizing your levels along with changing the point values in the Jive Community global point system.
Requirements
- Administrator access to the Jive Admin Console.
- Installed the latest version of the Jive Playbox.
- Familiarity with Jive's Playbox Features and Interface.
Process
- Log in to Jive as an Administrator.
- Go to your Avatar Menu.
- From the menu, click the Rewards Console to launch it.
- Click the Levels tab.
- For each level, you can edit the following fields:
-
User Badge
- Click the pencil icon to change the User Badge assigned. The image size should be 100 x 100 pixels and the recommended format is .JPEG, but you can use other image types: .PNG and .GIF.
-
Name
- To rename a level, simply type a new name in the Name field. Some common names for a Level 0 or Level 1, for example, can be Newbie. If you want to be more creative, you can also put in Fledgling or something similar.
-
Points
- Points that each user earns are counted towards each level. They are based on the event points defined in the Events tab. This field allows you to set a required number of points before a user can get a User Badge in their profile.
- Points that each user earns are counted towards each level. They are based on the event points defined in the Events tab. This field allows you to set a required number of points before a user can get a User Badge in their profile.
-
User Badge
- After customizing the fields above, click Save at the bottom of the page.
Confirmation
If the levels are successfully configured, you can check a specific user profile. Validate if the points and levels match the badge you configured, along with the supposed name of the level (be it a customized or a default level name).


Priyanka Bhotika
Comments