Overview
A Place in Jive is essentially a container that houses all the collaborative content for a specific subject or team. A Space, on the other hand, is a type of place, built in a hierarchy, with the ability to have a network of multi-level sub-spaces underneath it. This article provides information on how to create a new space from the Admin Console. Although you can create spaces from the user interface, it is easier to create several spaces quickly from the Admin Console.
Pre-requisites
Access to the Admin Console with permission to add places.
Process
To create a space from the Admin Console, please follow the steps below.
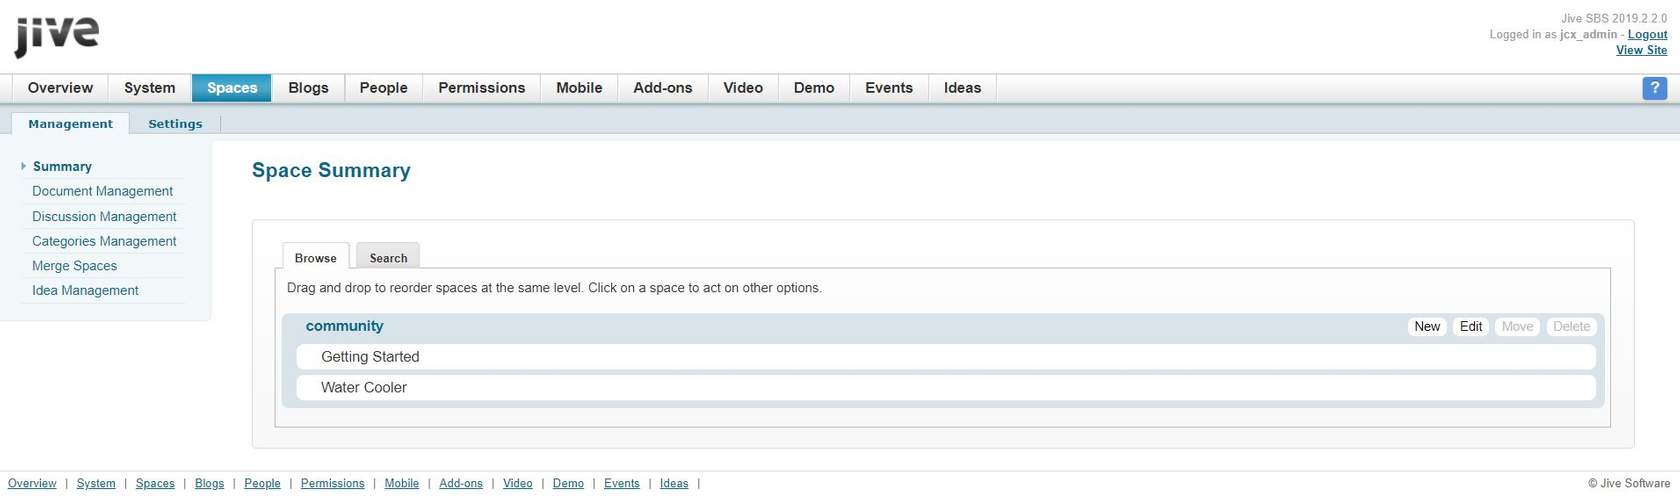
- Go to Admin Console: Spaces > Management > Summary
- Go to the Browse tab.
(Please click image to enlarge.)
- To create a new Space, click the name of the Space that will contain it, then click New.
(Please click image to enlarge.)
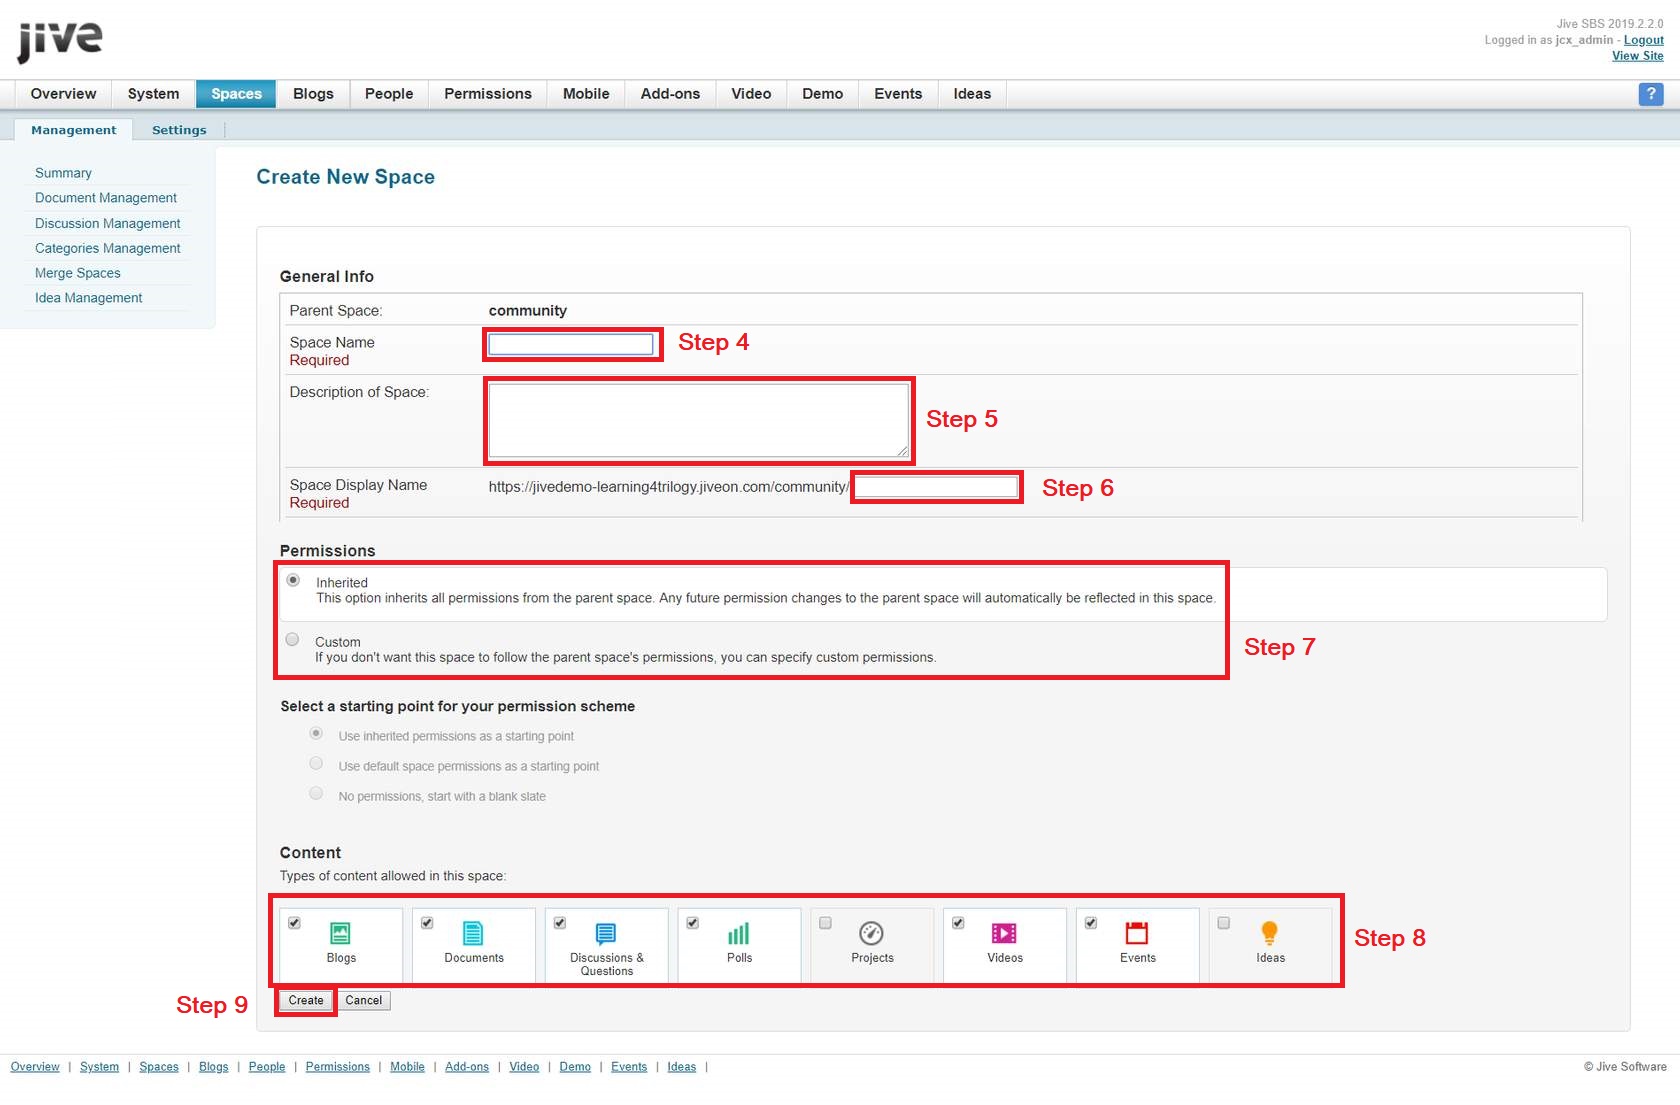
- On the Create New Space screen, in Space Name, enter a name to appear in the user interface.
- In Description of space, enter a description to appear in the user interface, such as a brief description of what the Space is for.
- In Space Display Name, enter the text to be used in Space URLs.
- Under Permissions, choose a default access scheme.
- Each of the options represents a set of permissions that you can also edit later.
- Under Content, select the content types you want to be available in the Space.
- Click Create.
Supplemental Information
Although most of the Space parameters can be configured through the user interface, some of them could only be edited via the Admin Console. Here is a list of the Space parameters that can only be configured within the Admin Console:
- Space deletion
- Setting up general Space settings
- Configuring discussions for Spaces
- Setting up document approver in Space
- Setting up abuse reporting
- Archiving discussion threads
- Fine-tuning extended properties
Priyanka Bhotika
Comments