Overview
This article guides users in enabling or adding certain logging levels to the default logging levels that Jive captures. This is usually done to gather more information when troubleshooting exceptions and issues with performance.
Prerequisites
- A user account with at least Manage System System Administration access over a Jive On-premise or Hosted instance. You will need to contact us to perform these on a Jive Cloud instance.
Information
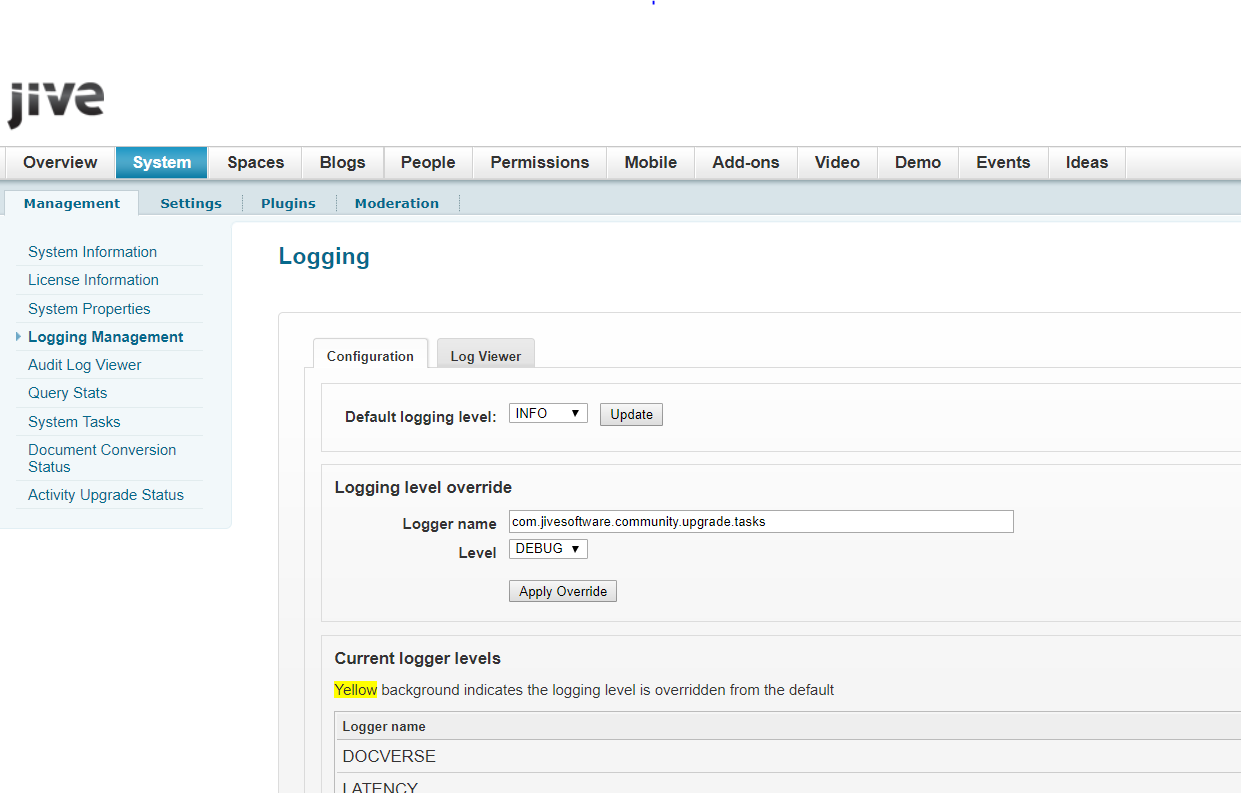
- From the Jive Admin Console, navigate to System > Management > Logging Management > Configuration.
- In the Logging level override section, enter the logger type that you need to add.
- Select the logging level.
- Click on the Apply Override button.
Please ensure removing the loggers as soon as they are not needed as they can negatively impact the performance.
Sample Use Case
The DEBUG logger com.jivesoftware.community.upgrade.tasks needs to be added while investigating an upgrade issue.
In this case, enter the com.jivesoftware.community.upgrade.tasks in the Logger name field and select DEBUG from the Level drop-down menu, then click Apply Override.

Priyanka Bhotika
Comments