Overview
Specific quests can be promoted and made available only for a specific group of users. You can do this by adding a permission group to a quest, or by filtering on other user attributes like Department, Location, Title, Skills, etc.
<supportagent>
Agents can help customers by adding permission group filters using the API.
</supportagent>
This feature is handy for product training programs that have a controlled roll-out plan wherein a quest must be visible to new hires, selected departments or levels, specific managers only, and many other combinations.
This article describes how you can create filters to specify group conditions for each quest.
Prerequisites
- Administrator access to the Jive Admin Console.
- Installed the latest version of the Jive Playbox gamification system.
- Familiarity with Jive's Playbox Features and Interface.
Solution
You must be logged in to Jive as an Administrator to perform the steps below.
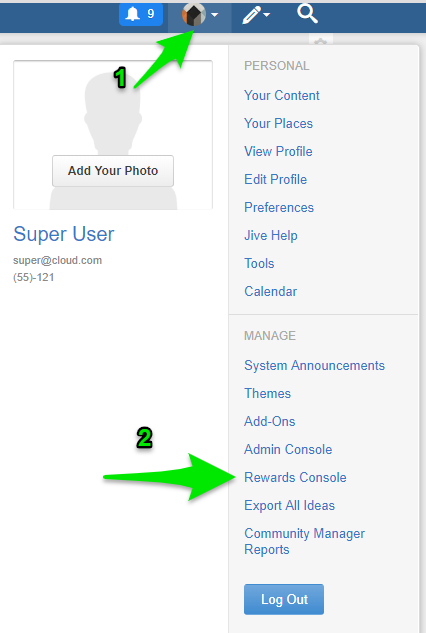
- Go to your Avatar Menu.
- From the menu, click the Rewards Console to launch it.
- You may get a message saying, “It looks like Rewards and Recognition wants access to your Jive account”. Press Allow.
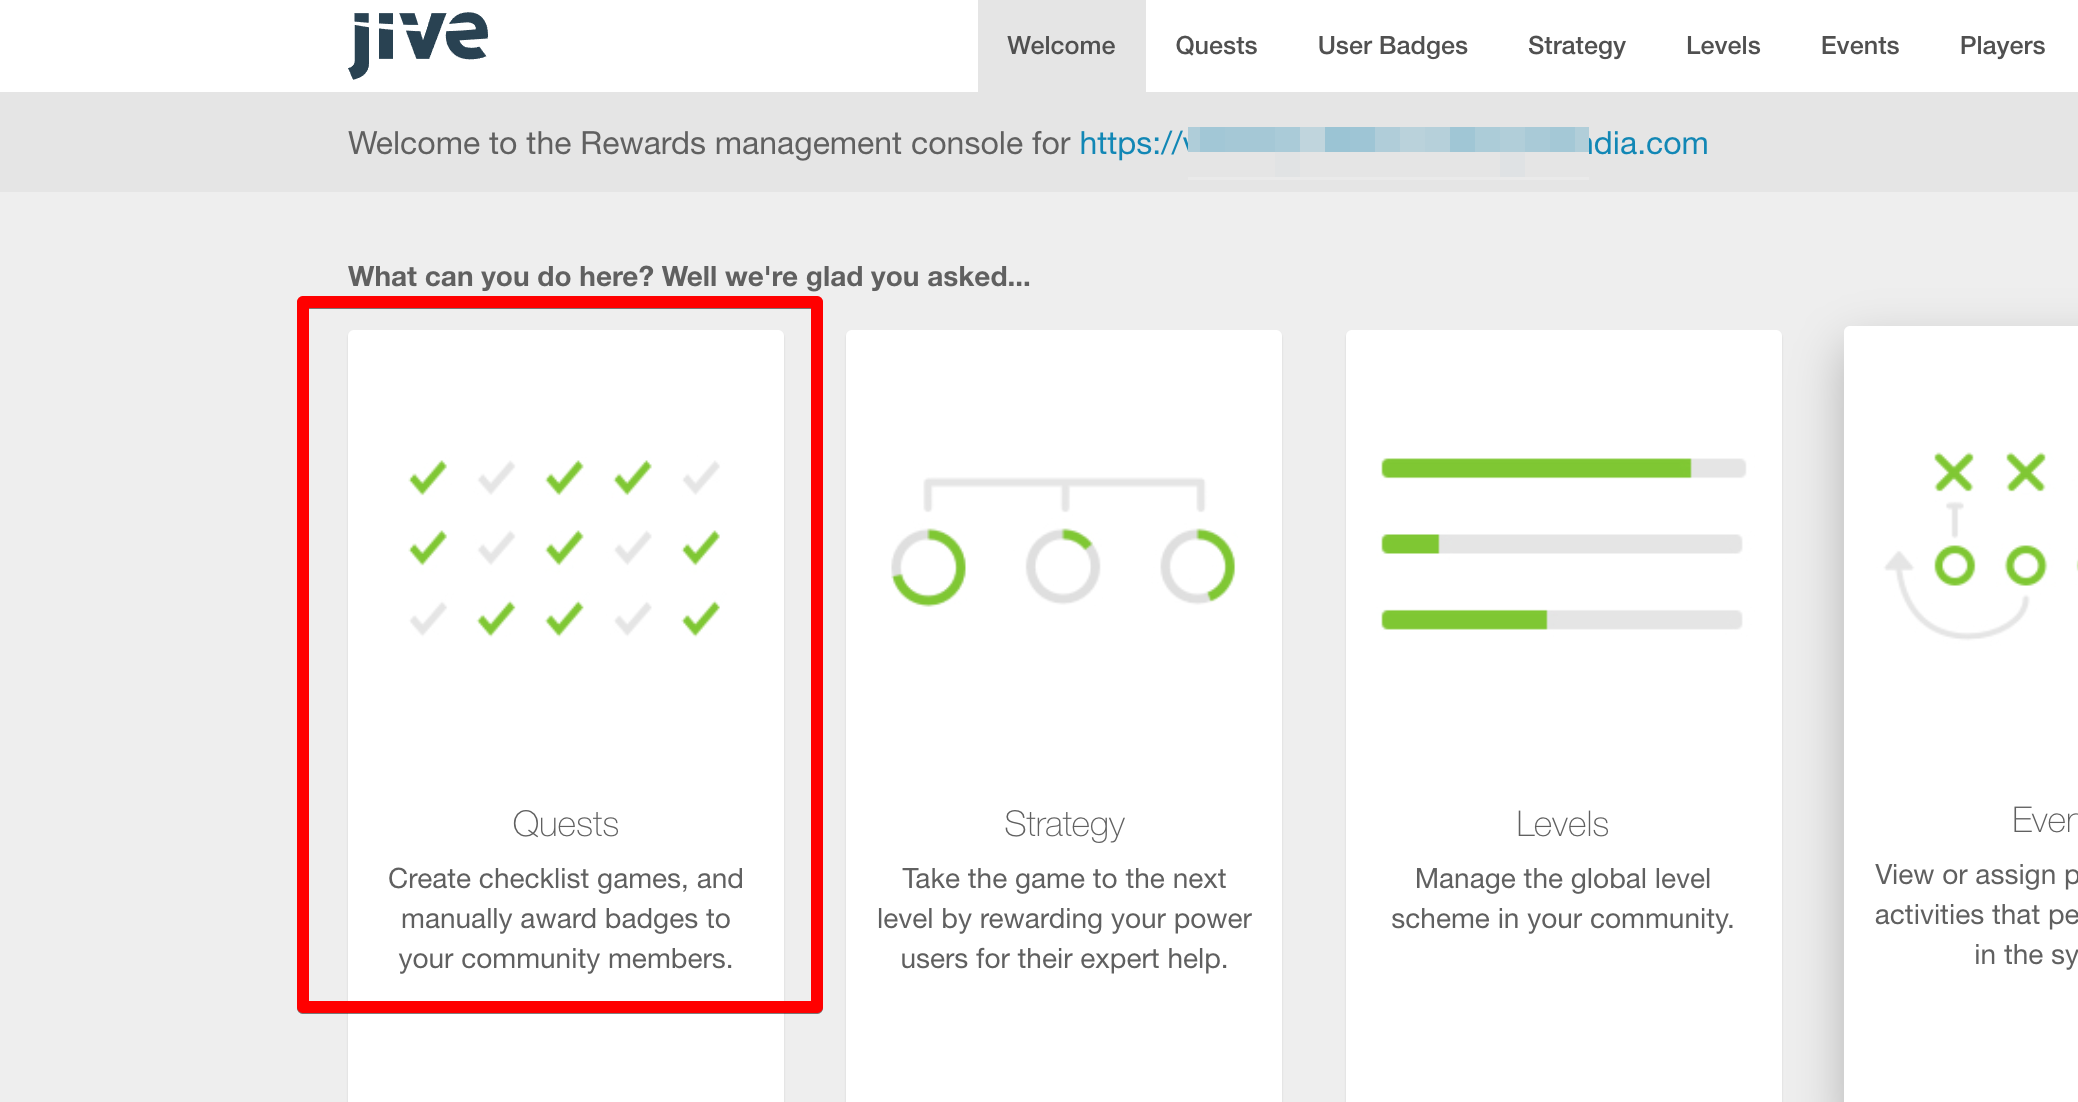
- Click the Quests card.
- Search for the Quest name that you need to limit to a certain group. Click this quest.
- Scroll to the bottom and click Configure.
- Scroll to the Filters section.
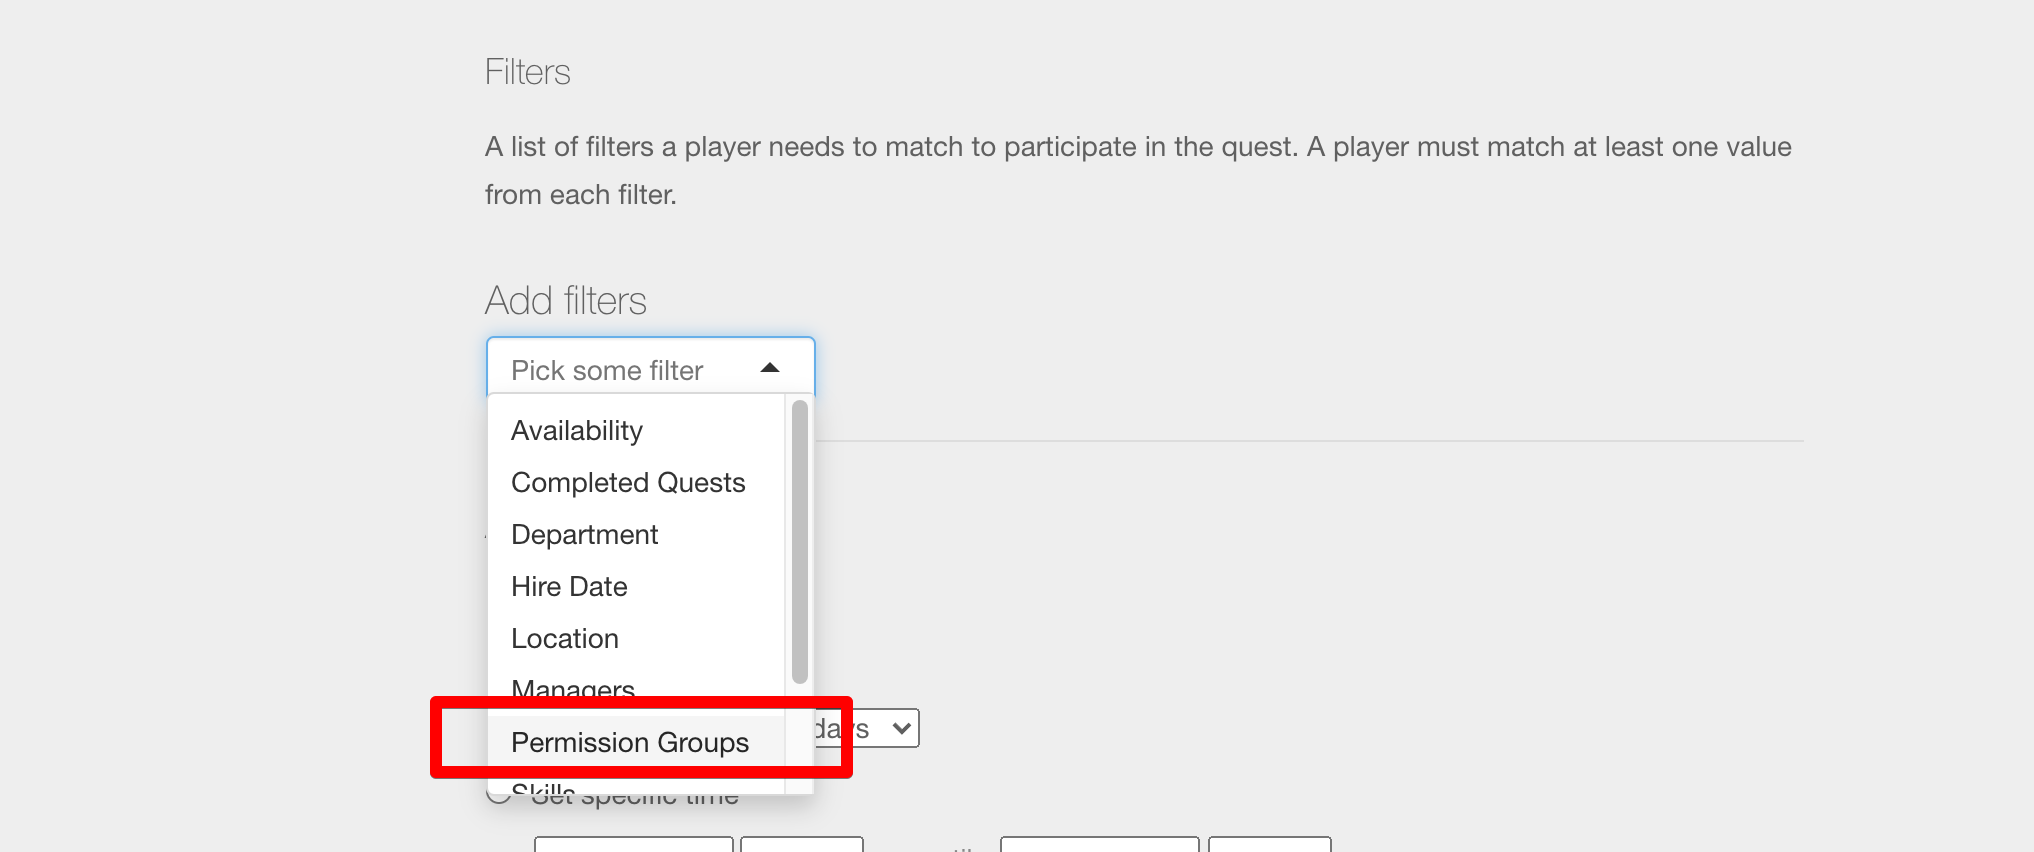
- From the Add filter dropdown menu, select the Permission Groups filter.
- Select a specific group that can participate in the quest, and press Add Filter.
- Besides permission groups, you can also filter on things like:
- Department: E.g. Users that are part of the HR department
- Location: E.g. Users that are located in Spain
-
Title: E.g. Users that have a Manager title
The available filters are dependent on the type of quest, roles available, and departments listed in the Jive community.
- Besides permission groups, you can also filter on things like:
- At the bottom, click Save quest.
<supportagent>
The above process may temporarily not work due to a known issue, documented in JVCLD-136372. You can assist the customer by using the API to add the permission groups, as per the below steps.
-
Get the rewards endpoint, tenant ID, and quest ID from the URL of the quest (execute steps 1 to 5 above).
- Say the tenant ID found is: c687f148-869b-4dc3-8762-a9da35972ddf
- Say the Quest ID found is: 9c19cb29-5f13-4743-81a5-840528ed815e
- Say the Rewards End Point found is: https://playbox-service.aws-us-east-1-ms-test.svc.jivehosted.com
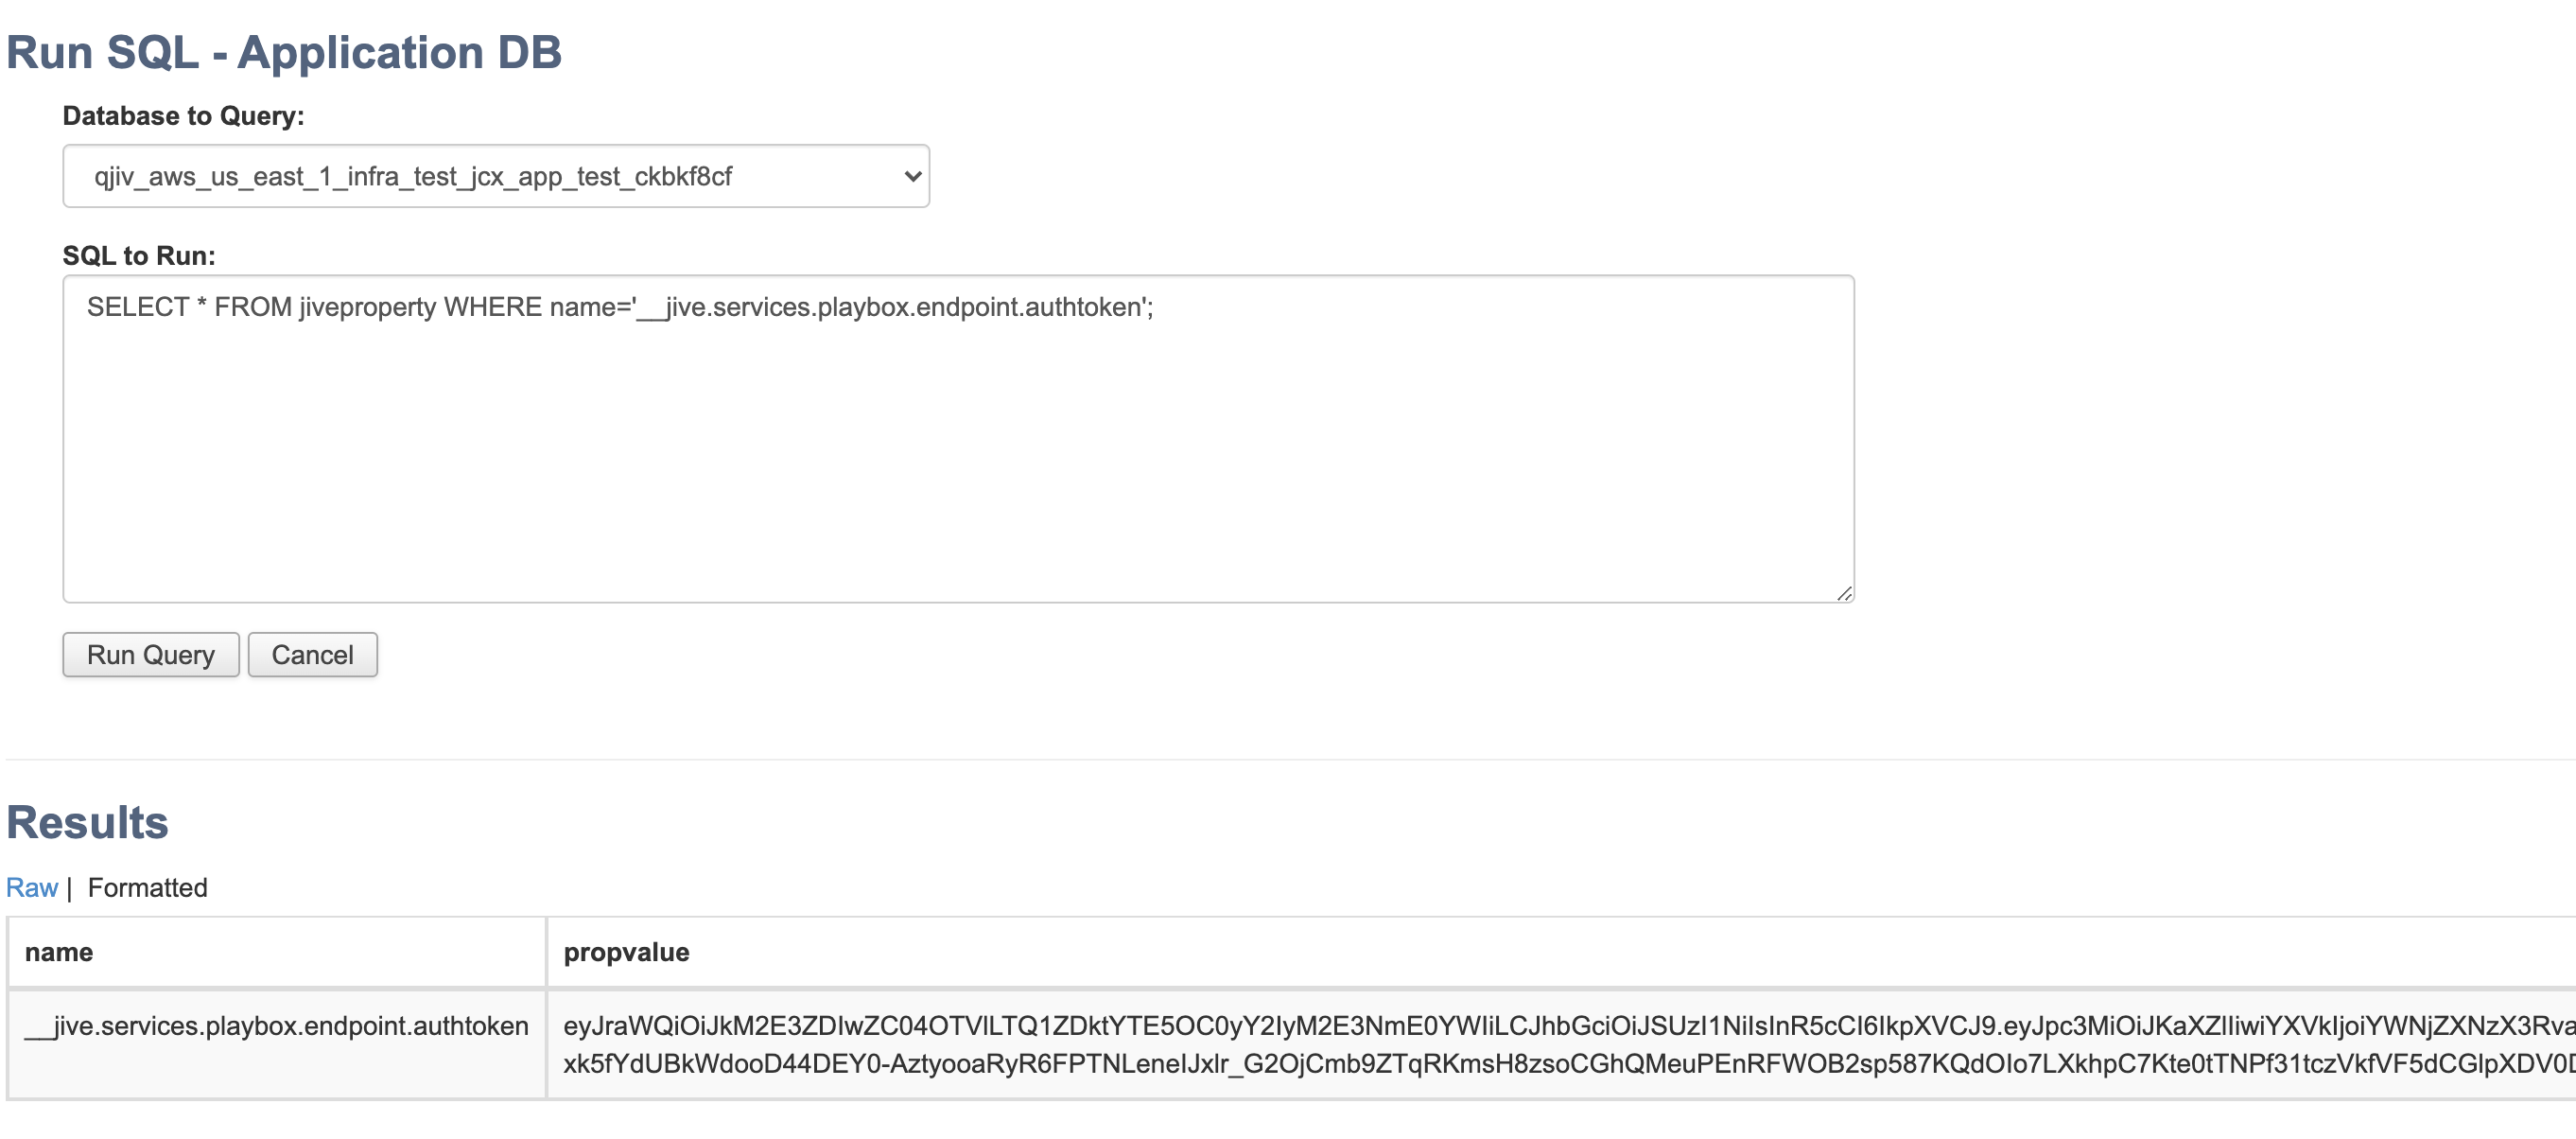
- Run this query in Magic Query and obtain authorization token:
SELECT * FROM jiveproperty WHERE name='__jive.services.playbox.endpoint.authtoken'; -
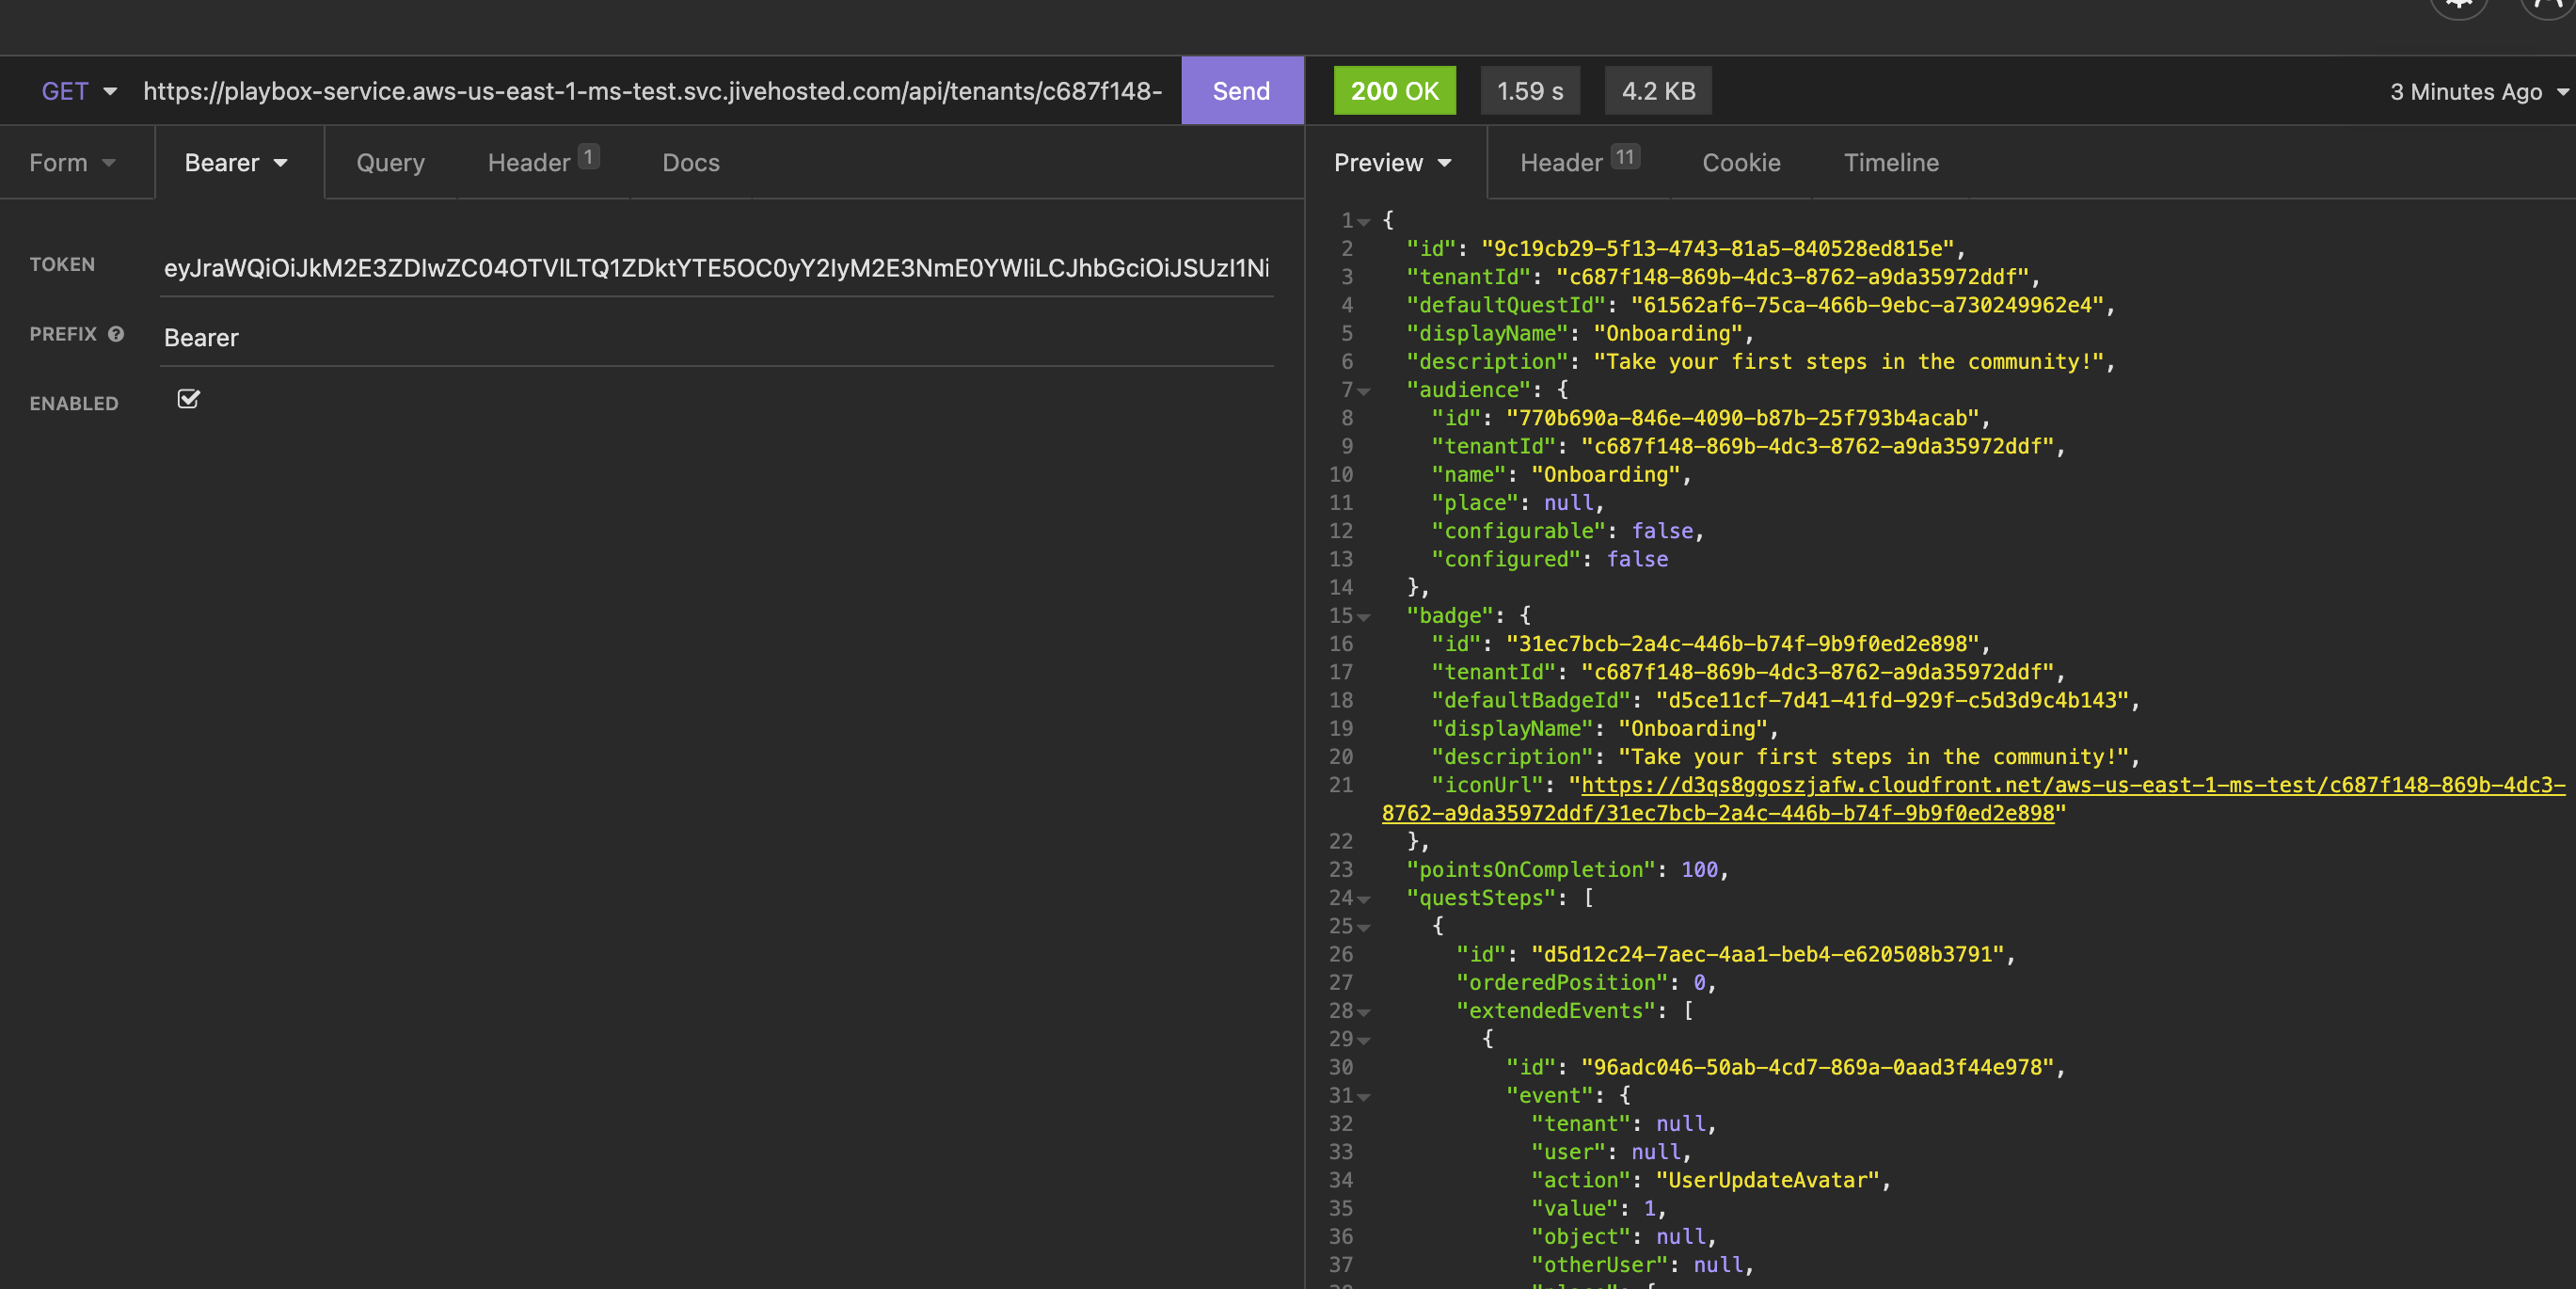
Obtain quest information with a GET request to
https://rewards-recognition.jivesoftware.com/api/tenants/c687f148-869b-4dc3-8762-a9da35972ddf/quests/9c19cb29-5f13-4743-81a5-840528ed815e- Substitute in the previously found Tenant ID and Quest ID.
- Use the previously found auth token as a Bearer Token for authorization in your API client (postman/insomnia etc.)
- The end-point is what you found in the previous step.
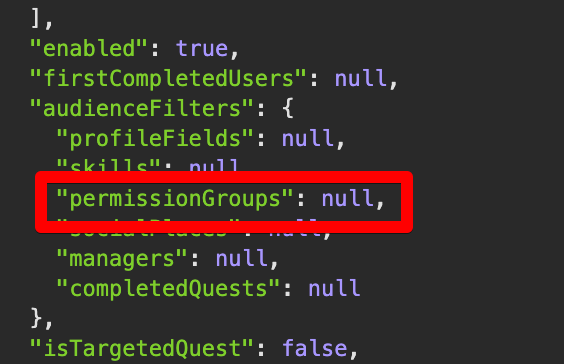
- Copy the response above into a text editor (like Sublime Text). Find the section that has permission group filters.
- This may be null if there is no existing permission group filter.
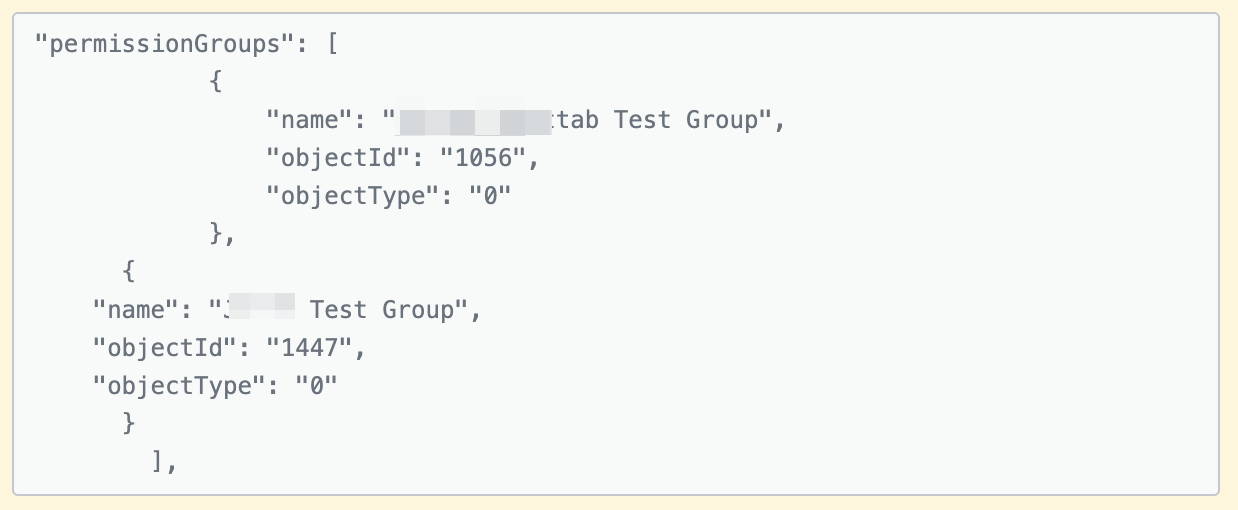
- Or this may already have existing permission groups listed.
- This may be null if there is no existing permission group filter.
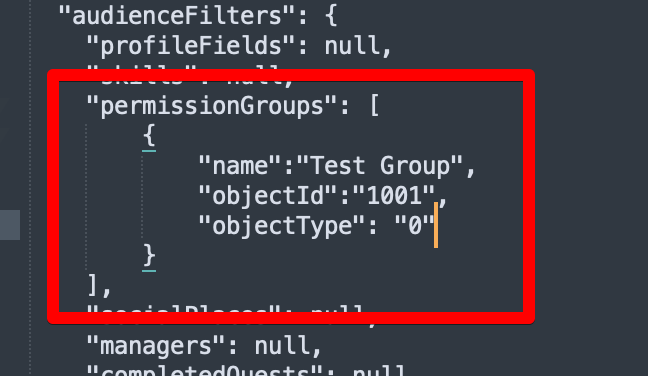
- For the Permission Group that you want to add, get the ID and Name from Admin Console > People > User Group Summary.
- Edit the response body that you copied in step 4 above, and create a new request body by inserting the new permission group information.
-
Use the entire request body (including what you got in the GET response, and what you inserted in the previous step) to create a new PUT request.
- The PUT request is sent to the same end-point as the GET request. I.e.
https://rewards-recognition.jivesoftware.com/api/tenants/c687f148-869b-4dc3-8762-a9da35972ddf/quests/9c19cb29-5f13-4743-81a5-840528ed815e - The Request text has to be added in Form > Text > JSON
- Perform the PUT request, and you should get a 200 OK status.
- The PUT request is sent to the same end-point as the GET request. I.e.
</supportagent>
Testing
After clicking Save Quest, only specific users will be able to see the filtered quest in their dashboard. In other cases, specific roles will be restricted from finding the filtered quest. Quest filters also limit the release of promotional notifications for newly created quests.
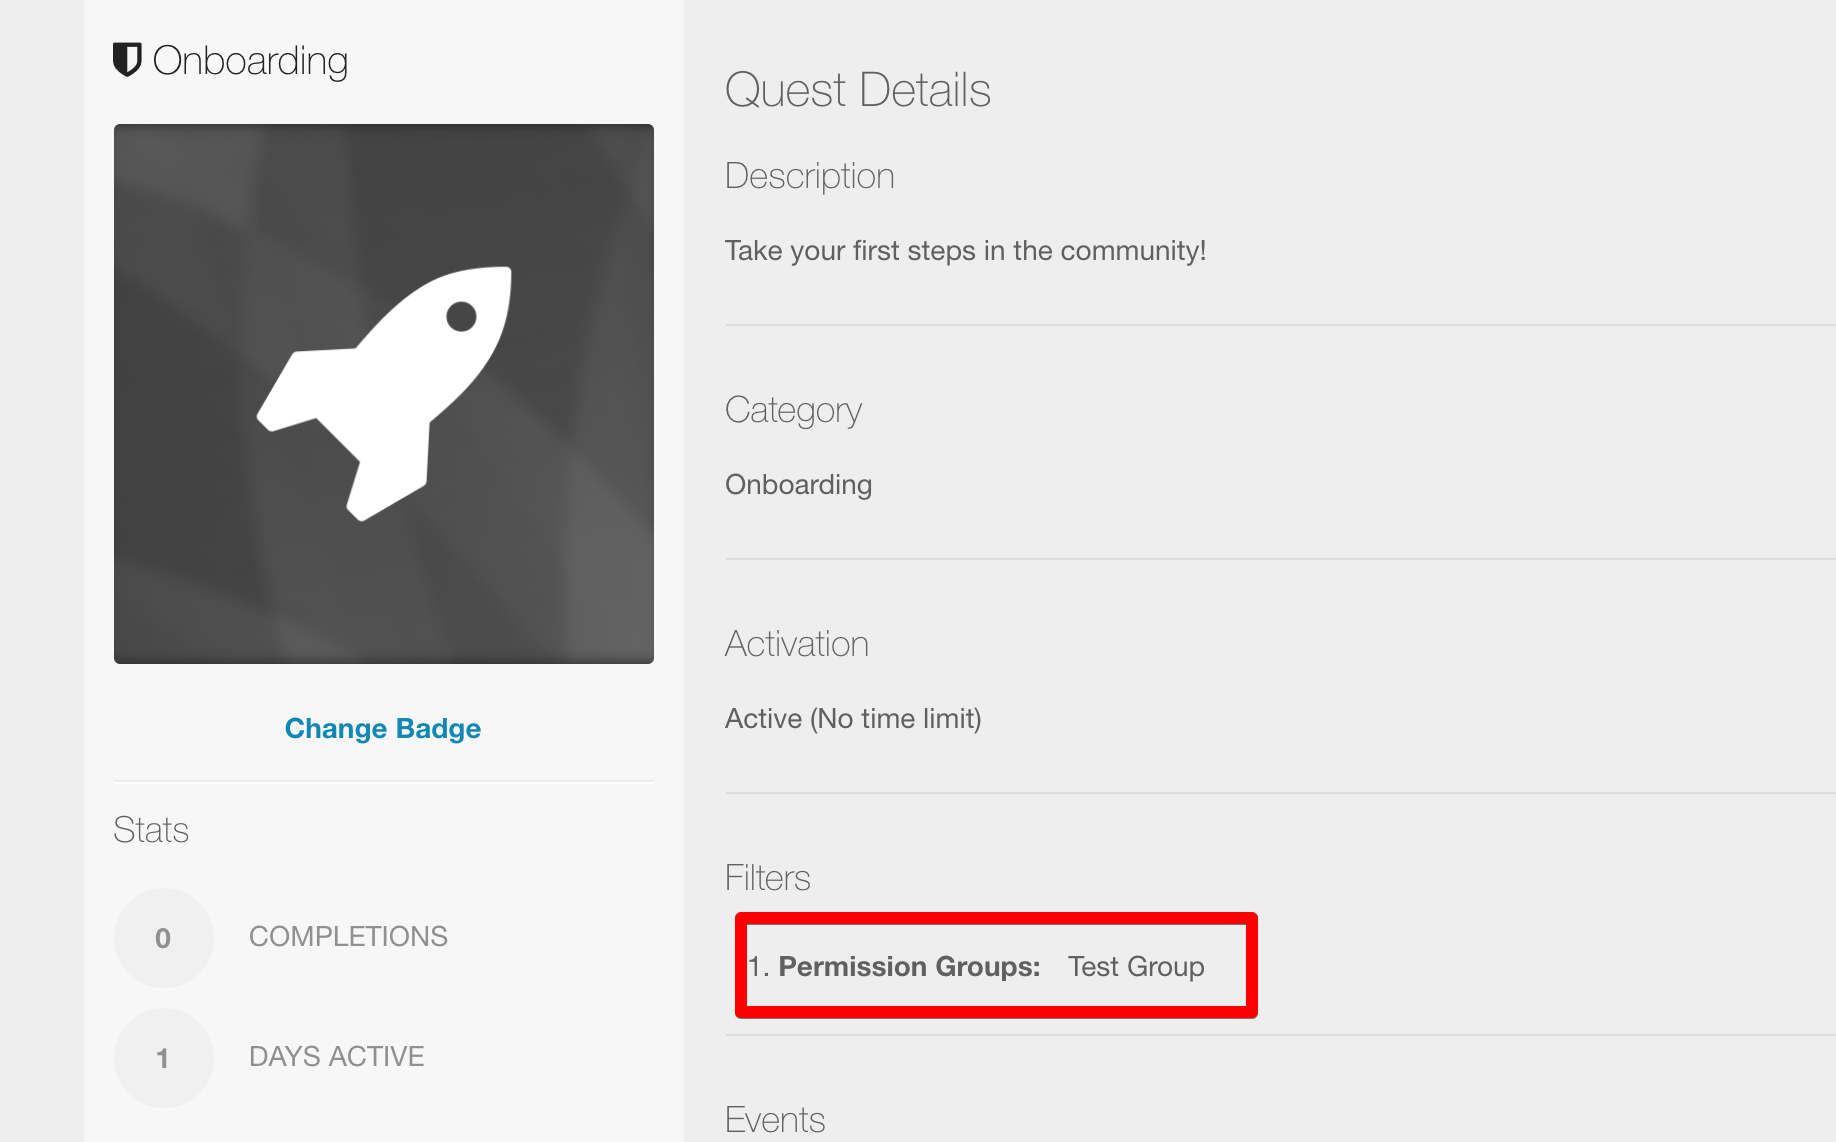
To check the Permission Group filter, log in to the instance and navigate to the quest (Steps 1 to 5 above). The newly added permission groups should show under filters.
Check if the group’s members have access to the quest
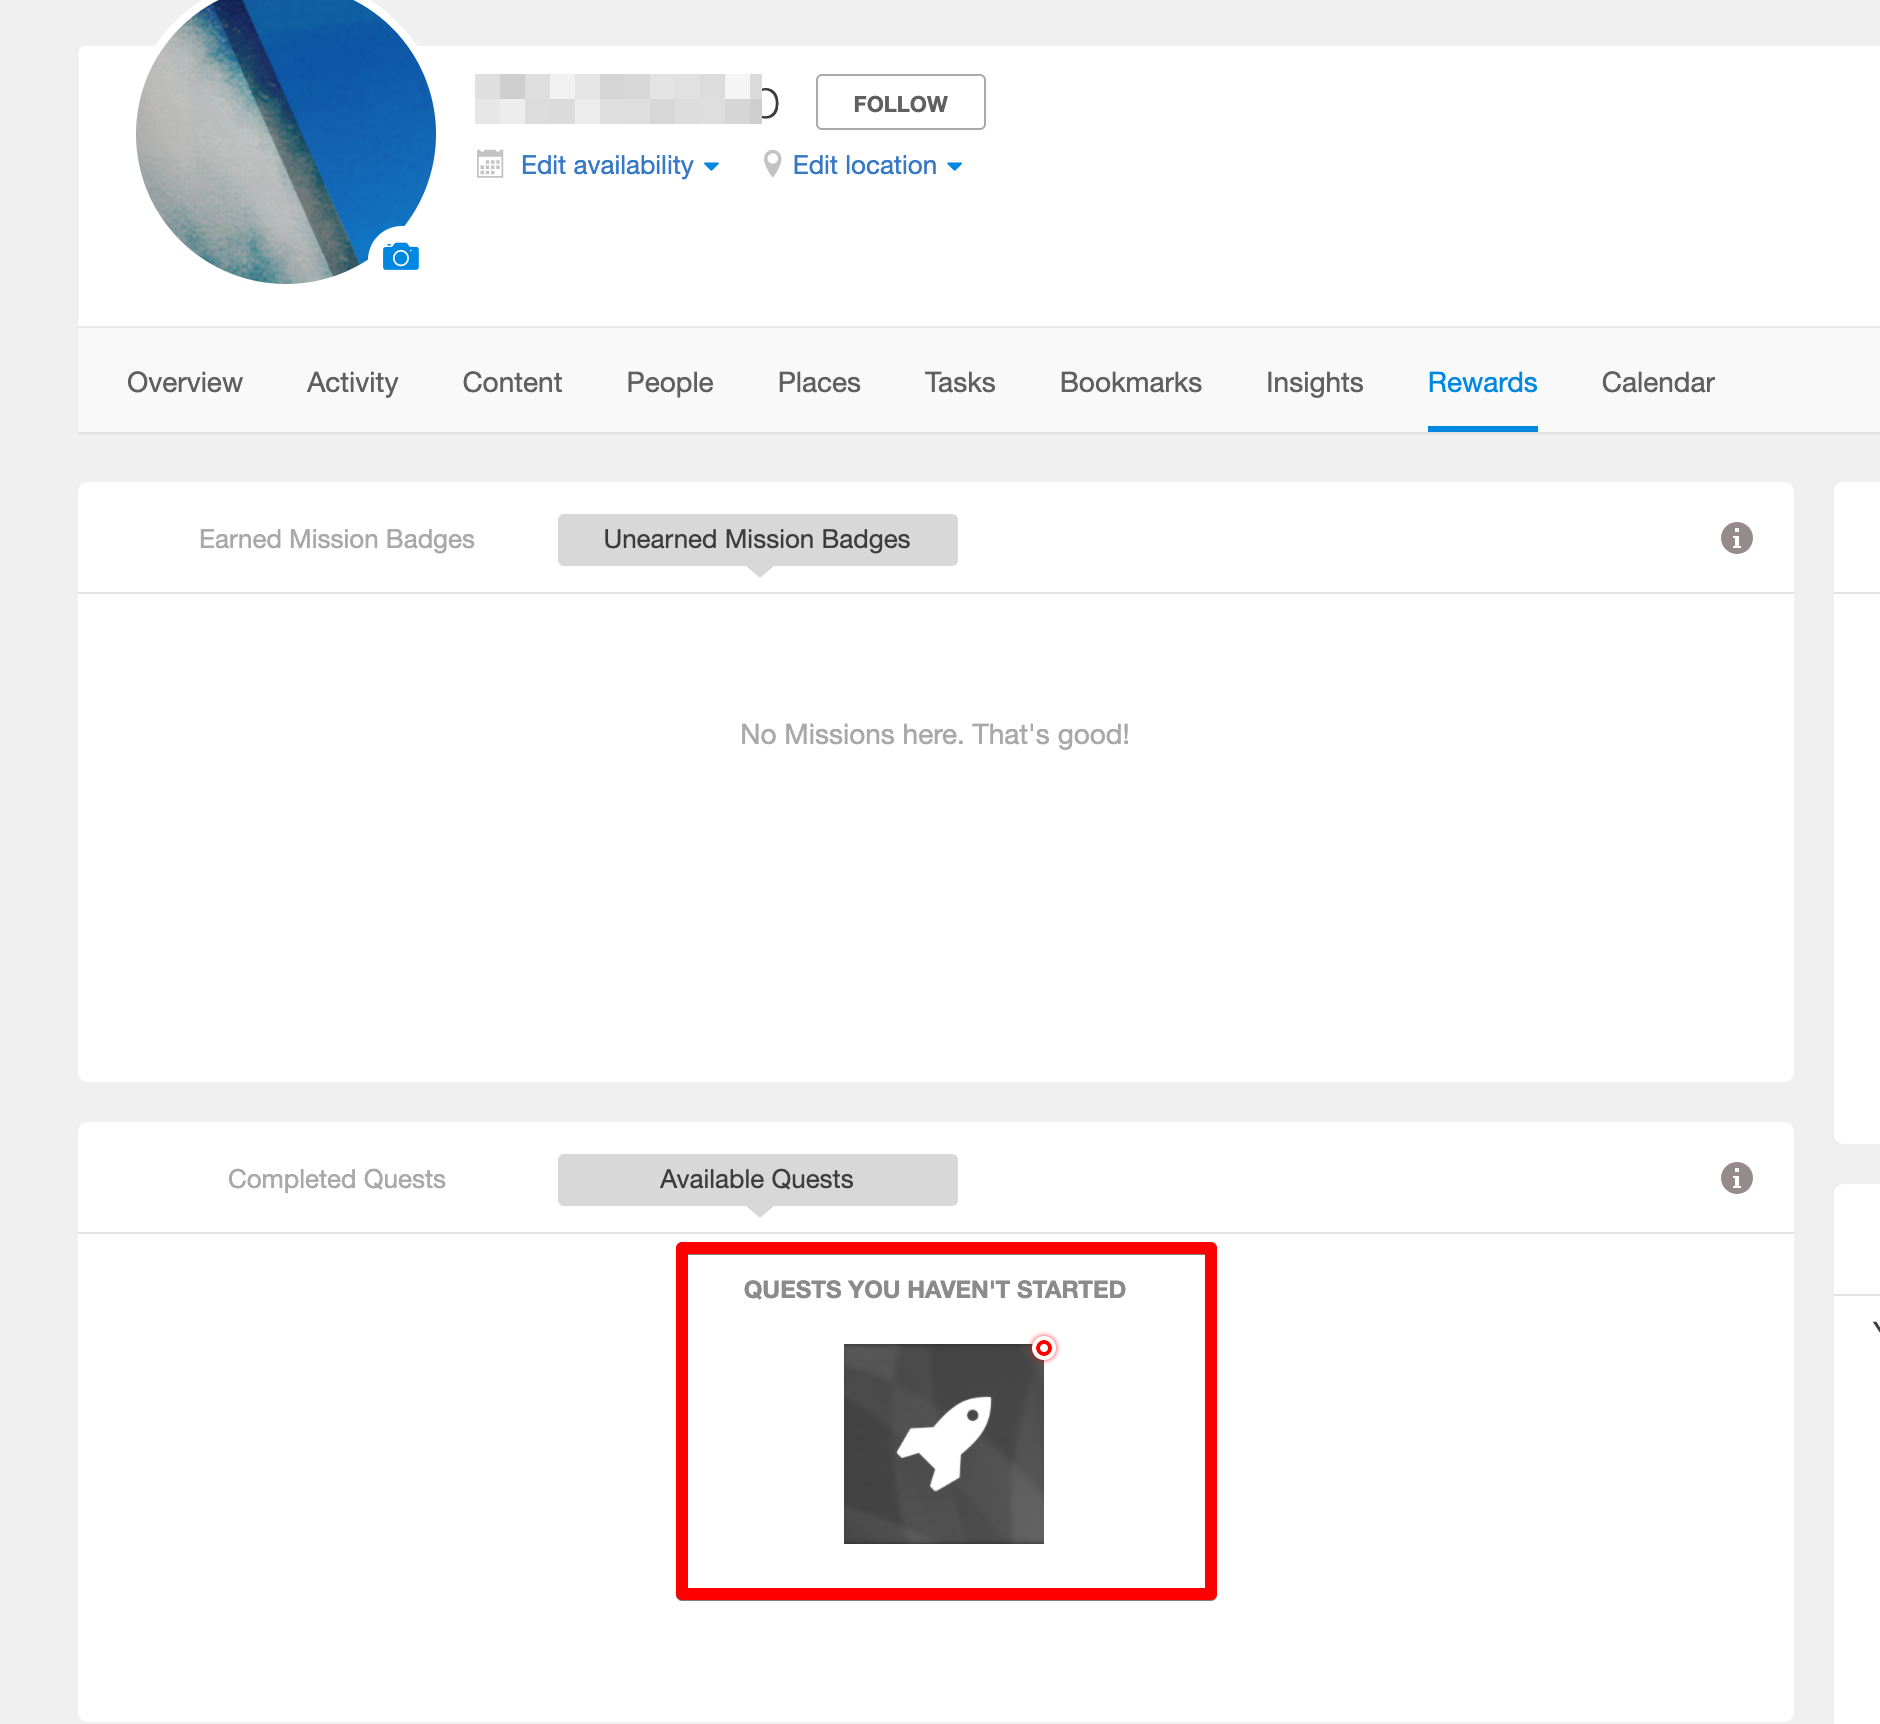
- In the main Jive Community UI, click “People > name of a user from the group that was added”
- Click “Rewards > Available Quests”
- The quest in question should be listed here. Click its icon for more details.
Note: If the user has never logged into Jive, the quest may not appear on their profile yet. They will need to log in at least once.






Priyanka Bhotika
Comments