Overview
Quests in Playbox allow users to earn a specified number of points and potentially a badge or real-life rewards by completing a one-time series of activities. These quests and the equivalent rewards can be configured using the Quests tab from the Rewards Console.
This article demonstrates the steps to create quests either as General Quests or Onboarding Quests. Advocacy Quests are discussed in a separate solution article.
Requirements
- Administrator access to the Jive Admin Console.
- Installed the latest version of the Jive Playbox.
- Familiarity with Jive's Playbox Features and Interface.
Process
Log in to Jive as an Administrator.
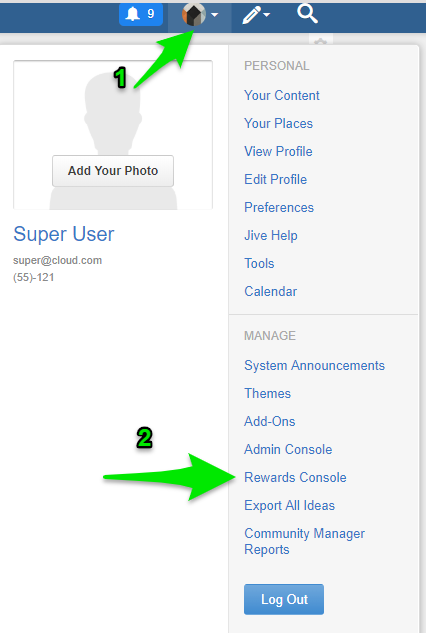
- Go to your Avatar Menu.
- From the menu, click the Rewards Console to launch it.
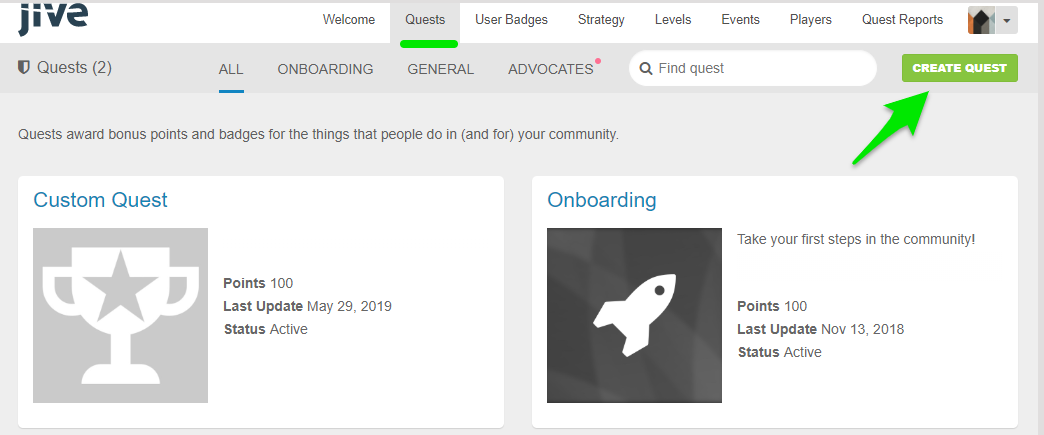
- Once you are in the Rewards Console, go to Quests.
- Then, click Create Quest.
- Fill in the fields to create the quest. In the Name field, specify a name for the quest.
- In Description, specify a description for the quest.
- From Choose a Category, choose a quest category that suits the events or location where you want the quest to appear. There are three default quest categories in Playbox:
-
General
- These quests appear in a place you specify, or on the Available Quests tab on the Your Profile > Rewards page.
-
Onboarding
- These are the quests found in the Inbox > Getting Started. The initial events that must be accomplished by every Jive Community member before they can take General Quests or perform other tasks. Usually, these are tutorials and future references.
-
Advocates
- These quests are visible only in the Advocacy Group and can only be completed by the group members.
-
General
- At the bottom of the page, click Save Quest to finalize the quest creation.
Confirmation
After clicking Save Quest, the new quest is created and will be displayed on the Quests tab of the Rewards Console. Once the Quests have saved, review the quest status and check the events of the quest. You can also change the quest badge.


Priyanka Bhotika
Comments