Overview
Projects are a great way to turn collaboration into action and track your progress. They are useful for giving a collaborative work a context that is time-based and outcome-oriented. With a project, you collect content in a way that aligns user work with a schedule toward a specific goal. You can then create and assign people tasks and sub-tasks associated with the project to make sure everything gets done. This article provides information on how to create a project.
Pre-requisites
Permission to edit the place where the project will be created.
Process
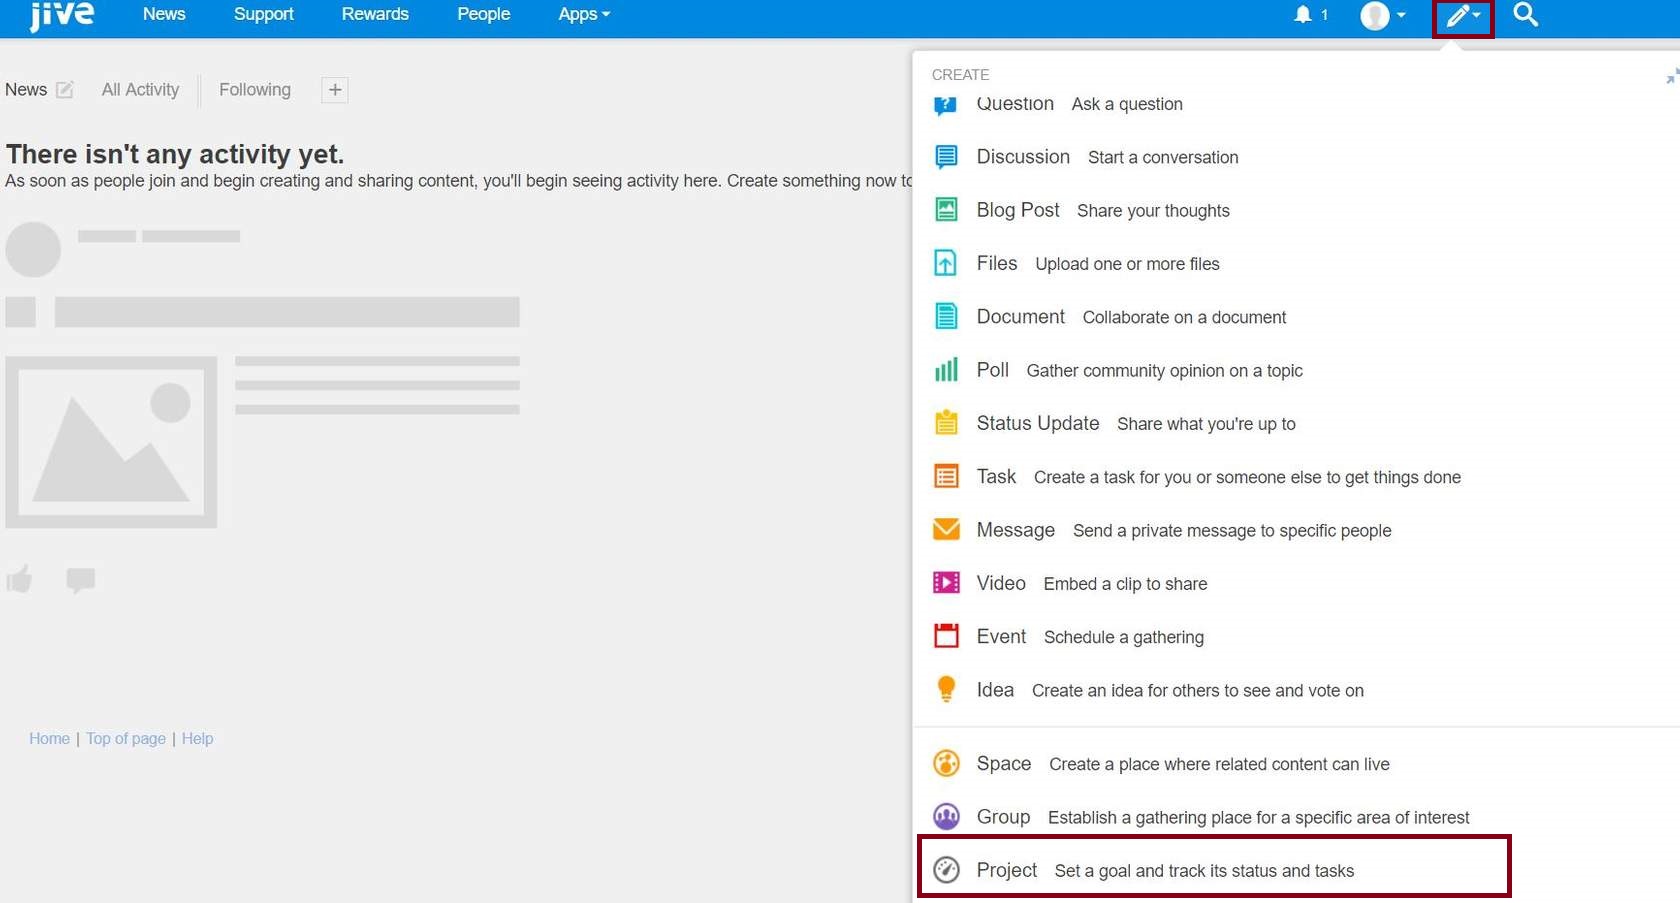
- From the user interface, click Pencil Icon.
- Click Project.
(Please click on the image to enlarge.)
- In the dialog box, select a location for the project.
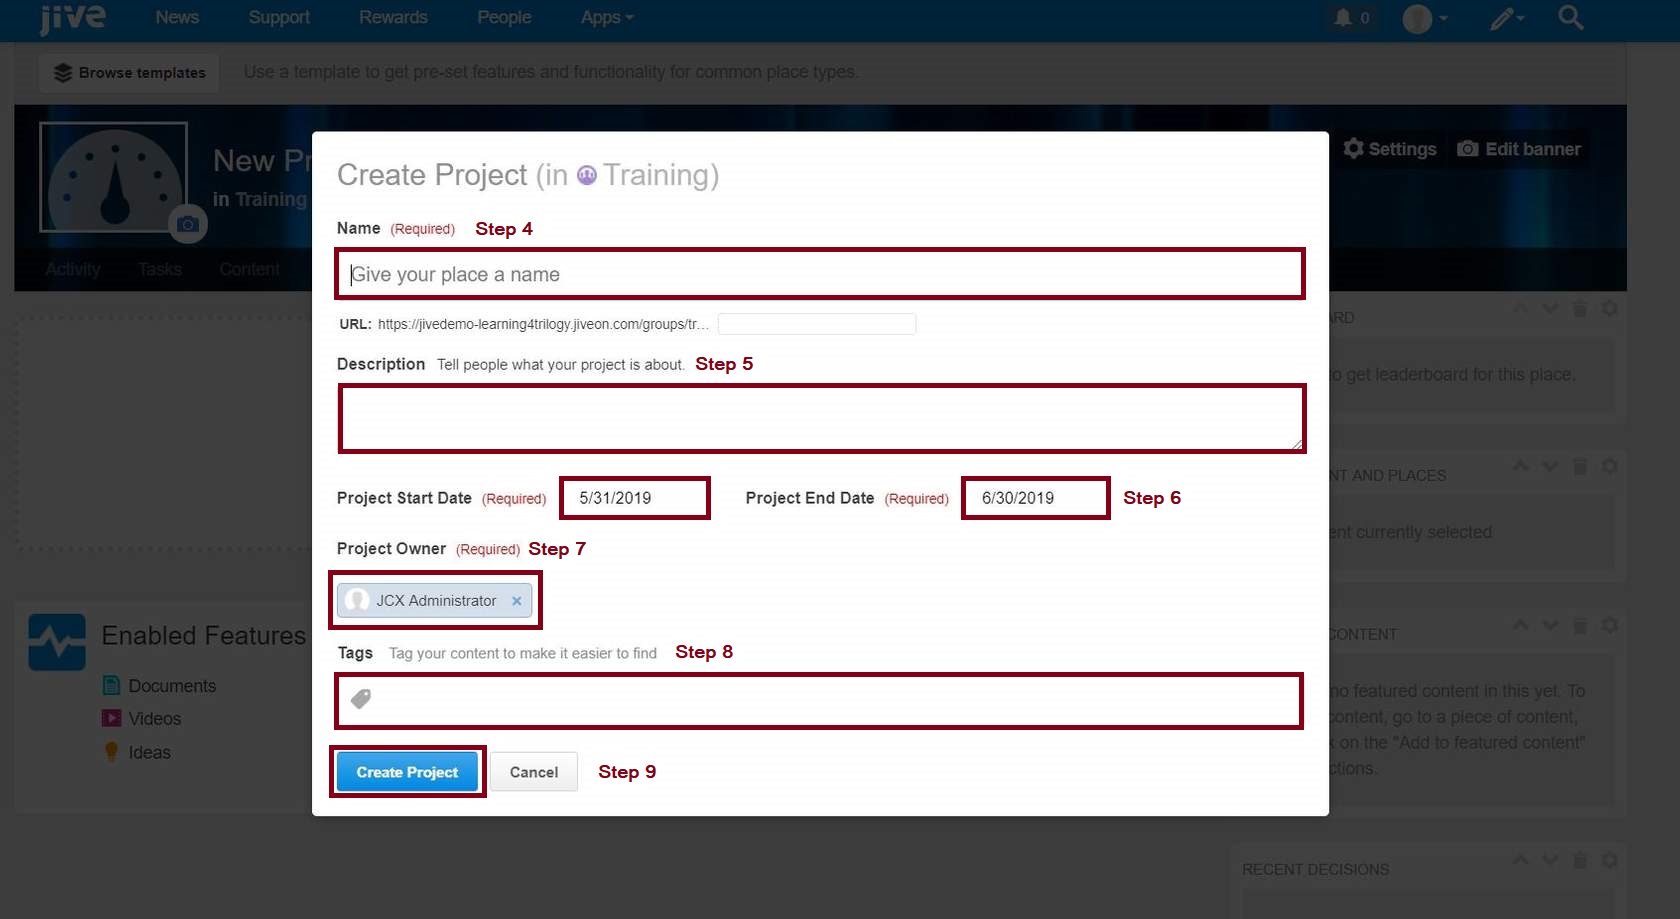
Projects are associated with a place, such as a space or a group. The place you choose determines who can see and collaborate on the project. - In Name, specify an identifying name for the project.
(Please click on the image to enlarge.)
- In Description, enter a brief description that appears in the user interface.
- In Project Start Date and Project End Date, specify the project duration.
- If necessary, change the project owner in Project Owner.
The default owner is the person creating the project. - In Tags, specify tags that can be used to find this project.
- Click Create Project.
Additional Information
- If it is configured in your community, you can also select a place category in Categories.
The place categories are used to identify places while browsing. They are used to classify places and differ from content categories. - If widgets are enabled in your community you can enable the Overview page.
- Click Advanced Options, and select the Overview page checkbox.
By default, your project uses an Activity page as its main page with the option to add more custom pages. We recommend using an Activity page because it can be displayed on mobile devices and it is more user-friendly for streaming content.
- Click Advanced Options, and select the Overview page checkbox.
- If you are using the Activity page, you can apply a place template to your project, as described in Applying place templates.
The default template is Team Collaboration. For more information, see General place template reference. - If you use the checkpoint and status functionality for tracking project tasks, you can use the old-style Overview page rather than using the Activity page in the place template format. The widgets in the Overview page more effectively support projects at this time.
We do not recommend you to use widgets and widgetized Overview pages in your community. For more information, see Understanding pages in places. - Once the project is created you can add tasks to it. For more information, see Creating tasks.
- You can further customize the project. For more information, see Designing activity and custom pages for places.


Priyanka Bhotika
Comments