Overview
Jive includes a set of message templates that determine the message and content sent to users in response to specific events. This article provides information about how to modify these templates to suit the needs of your organization and Jive community.
Environment
- Jive Hosted / On-Prem 8.0+
- Jive Cloud
Information
Warning: While you can edit message templates, Jive recommends that you consider carefully any modifications that you make from the default settings. Customizations to email templates increase your upgrade burden.
Process
To be able to edit your message templates, you will require a Jive user account with admin rights.
-
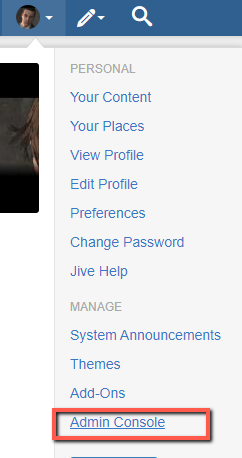
Navigate to Your Avatar > Admin Console
-
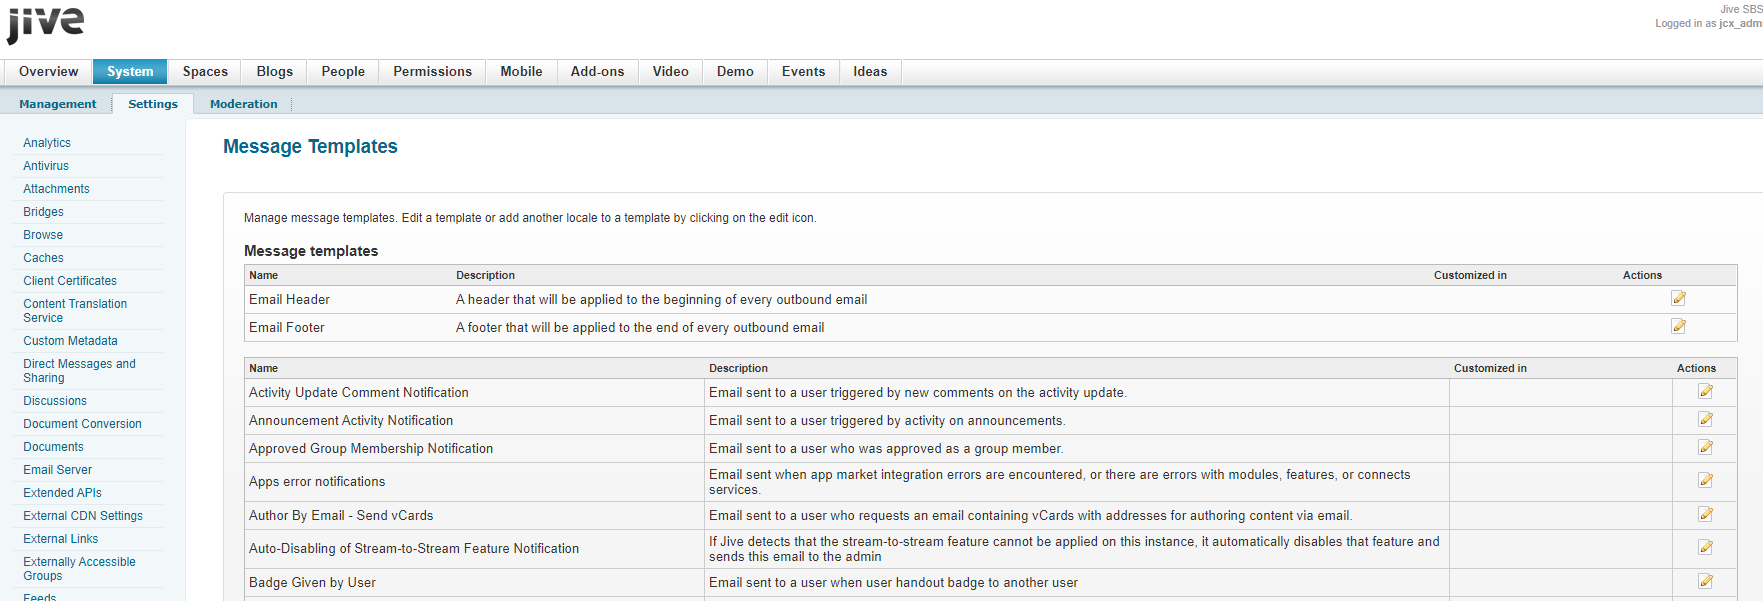
Click System > Settings > Message Templates
At the top of the page, you can customize the header and footer of outbound emails, and further down are all of the other message templates that you can modify.
Email messages sent by Jive can be plain text or HTML, and each template includes a separate version of each.
Placeholder tokens
When you are editing templates, use the syntax of Apache FreeMarker. Each template supports a specific set of placeholder tokens for email content that vary from message to message.
For example, the notification email sent to users following a document includes tokens for the followed document, the following user, and the URL of the followed document. In the template text, refer to tokens by using FreeMarker syntax, such as ${document}, ${user}, or ${docURL}.
As you edit the template, click Preview to see your work.
Template examples
Here are examples designed to tell a user that an item they are following has been updated. This template begins by telling the recipient the name of the user who created or modified the item.
It then provides the title of the item ("subject"). The template then checks to see if the system is configured to support other features related to content and may display one or all of the messages (in the template) to the recipient:
- If the system allows commenting on the item by replying to the notification email
- If the system supports updating the item by sending a new version via email
- If the system supports creating new content via mail
Plain-text Template Example
${contentAuthorName} <#if contentAuthorURL?has_content>[${contentAuthorURL}]</#if> <#if isNewContentItem?? && isNewContentItem>created<#else>modified</#if> the document:

"${contentSubject}"

To view the document, visit: ${contentURL}

<#if includePostContentInEmail && !docVerseDocument && !binaryDocument>
--------------------------------------------------------------
${contentTextBody}
--------------------------------------------------------------
</#if>

<#if emailReplyEnabled>
<#if docVerseDocument && docVerseEnabled>
By replying to this email, you can take action on this document.  If you attach a new version as a file to the email,
a new version of the document will be created.  The body of the reply, if any, will be treated as a comment.
Comment by replying to this email -or- go to the document on ${SkinUtils.getCommunityName()}
[${contentURL}]
<#else>
Comment by replying to this email -or- go to the document on ${SkinUtils.getCommunityName()}
[${contentURL}]
</#if>
<#elseif hasRespondEntitlement>
Comment by going to ${SkinUtils.getCommunityName()}
[${contentURL}]
</#if>

<#if emailCreateEnabled>
Create a new document in ${containerName} by email
[${newContentAddress}] -or- at ${SkinUtils.getCommunityName()}
[${newContentURL}]
<#elseif hasCreateEntitlement>
Create a new document in ${containerName} at ${SkinUtils.getCommunityName()}
[${newContentURL}]
</#if>
HTML Template Example
<h3 style="margin: 10px 0 5px; font-size: 17px; font-weight: normal;">
    ${contentSubject}
</h3>
<span style="margin-bottom: 10px;">
    <#if isNewContentItem?? && isNewContentItem>created by<#else>modified by</#if> <#if contentAuthorURL?has_content><a href="${contentAuthorURL}">${contentAuthorName}</a><#else>${contentAuthorName}</#if> in <i>${containerName}</i> - <a href="${contentURL}">View the full document</a>
</span>
<hr style="margin: 20px 0; border: none; background-color: #dadada; height: 1px;">

<#if includePostContentInEmail && !docVerseDocument && !binaryDocument>
${contentBody}
</#if>

<div style="background-color: #f4f4f4; padding: 10px; margin-top: 20px;">
<#if emailReplyEnabled>
<#if docVerseDocument && docVerseEnabled>
    <p style="margin: 0;">By replying to this email, you can take action on this document.  If you attach a new version as a file to the email,
    a new version of the document will be created.  The body of the reply, if any, will be treated as a comment.</p>
<#else>
  <p style="margin: 0;">Comment by replying to this email -or- <a href="${contentURL}">go to the document on ${SkinUtils.getCommunityName()}</a></p>
</#if>
<#elseif hasRespondEntitlement>
    <p style="margin: 0;">Comment by <a href="${contentURL}">going to ${SkinUtils.getCommunityName()}</a></p>
</#if>

<#if emailCreateEnabled>
  <p style="margin: 0;">Create a new document in ${containerName} by <a href="mailto:${newContentAddress}">email</a> -or- at <a href="${newContentURL}">${SkinUtils.getCommunityName()}</a></p>
<#elseif hasCreateEntitlement>
  <p style="margin: 0;">Create a new document in ${containerName} at <a href="${newContentURL}">${SkinUtils.getCommunityName()}</a></p>
</#if>
</div>
Password Information in Email Templates
The User Creation Welcome Email template supports including the ${password} token while it is being defined. However, through this setup, the user passwords are sent embedded as simple text in the email body, leaving its security at risk.
You can use the following markup in your email templates to add links to password reset:
- In plain text:
<#if jiveURL?has_content> Someone created your account on your behalf. If you did not receive a password from that person, you'll need to click on "I forgot my password" or go to reset your password at ${instanceURL}emailPasswordToken!input.jspa <#else> Someone created your account on your behalf. If you did not receive a password from that person, you'll need to click on "I forgot my password" </#if> username: ${newUserUsername} - In HTML:
<p>
<#if jiveURL?has_content>
Someone created your account on your behalf. If you did not receive a password from that person,
you'll need to click on "I forgot my password" or go to reset your password
at <a href='${instanceURL}emailPasswordToken!input.jspa'>${instanceURL}emailPasswordToken!input.jspa</a> to update your password.<br>
<#else>
Someone created your account on your behalf. If you did not receive a password from that person,
you'll need to click on "I forgot my password"<br>
</#if>
<br>
username: ${newUserUsername}
</p>


Priyanka Bhotika
Comments