Overview
This article provides the steps to install an add-on. A Jive add-on is an archive file containing configuration settings and other data that can be installed into a Jive community.
Information
Installing an add-on is a secure way of expanding a Jive community with custom apps, tiles, streams, external storage frameworks, and other Jive extension types. Add-ons can be installed by community managers and are managed from the Jive UI using the Add-Ons menu option.
- Environment: Jive Community 8 or higher versions
- Requirement: Jive Community Manager access
Updating an add-on uses a similar process with installation, except for the modification of JavaScript Object Notation (JSON) files. When installing an add-on with the same UUID, it will overwrite the Add-on and assets with those included in the new archive; barring installation errors. The version number will not affect an update and should be for developer references only.
Process
- Log in to your Jive environment. You either need to be a community manager or have the ability to install add-ons for personal use on this Jive server.
-
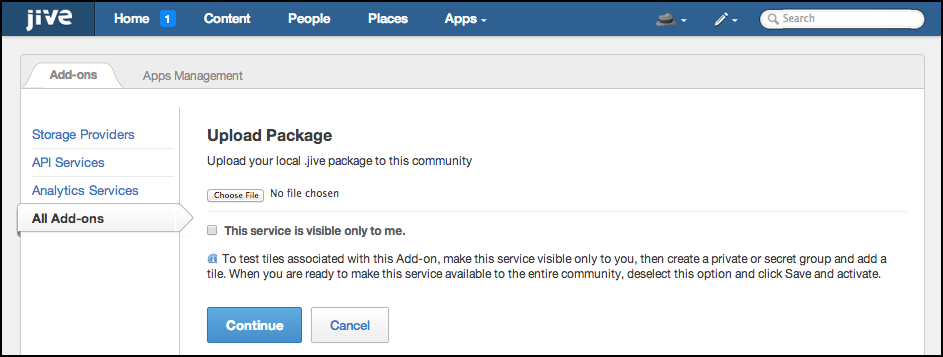
Upload the add-on package.
- Select Add-ons from the Manage area of the account settings.
- Click "Upload Package".
- Click Choose File and select the add-on package to upload.
- After selecting the file, click Continue.
- Select Add-ons from the Manage area of the account settings.


Confirmation
A notification will appear to confirm whether the add-on was successfully installed or failed.
- Sample successful install message:
- Sample fail install message:


If the JSON files are missing, this can be resolved by updating the meta.json and defnition.json. Read Updating the Add-On JSON Files for more details.
Priyanka Bhotika
Comments