Overview
You may see an issue with Spaces where the number of users that follow a Space is displayed incorrectly when accessed through the Space UI. This occurs when the user count shown in the Manage Space page in the Space settings is out of sync with the backend database tables.
Diagnosis
If you have a Jive Hosted or Cloud instance, please skip this section and go directly to the Solution section.
If you have a Jive On-premise instance, you verify the values in the backend database tables by:
- Querying the
jiveBrowseCntrtable to find the browseid of the affected Space. - Then find the number of users following the Space by filtering through the browseid and querying the
jiveBrowseFoltable.
Please see the Database Schemas for more details on the structure of the database tables.
Database query example
These queries use Postgres SQL syntax. The syntax may change if you are using a different database provider with your Jive On-premise instance.
Finding the browseid of the affected Space
SELECT displayname, name, browseid FROM jiveBrowseCntr
WHERE name ilike '%<space_name>%' and objecttype=14
- Replace <space_name> with the name of the affected Space in the query above.
- The objecttype=14 signifies a community (Space or a Group).
Finding the number of users following the Space
SELECT count (*) FROM jiveBrowseFol where browseid=<browseid>
- Replace <browseid> with the actual value obtained in the previous step.
Prerequisites
Administrative access over your Jive instance.
Solution
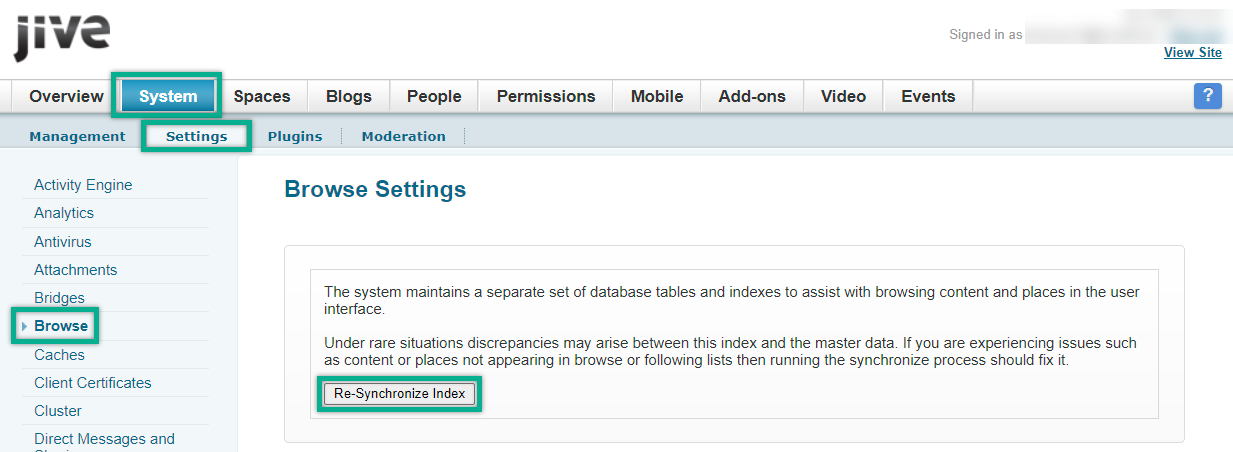
Step 1: Synchronize Browse index data
- Navigate to Admin Console > System > Settings > Browse.
- Click on the Re-Synchronize Index button.
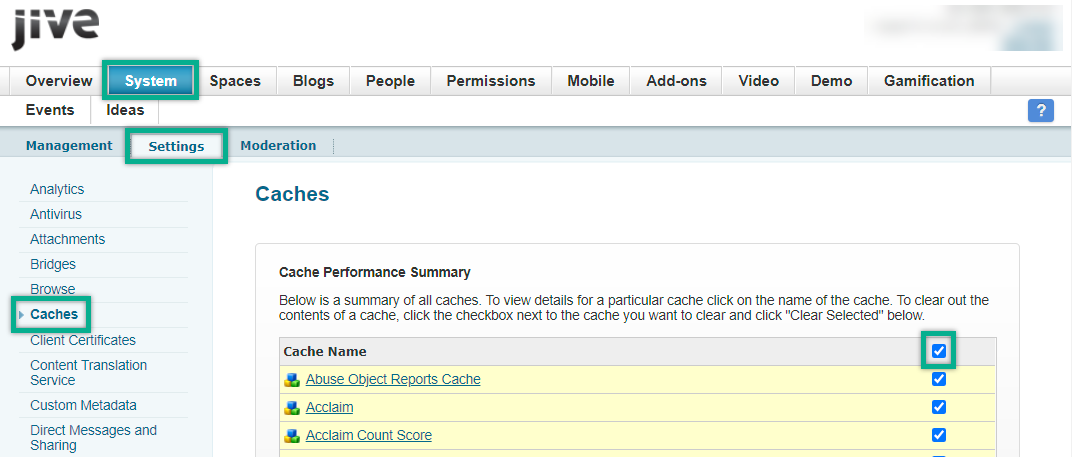
Step 2: Clear the Application Cache
If you are still seeing the issue, it may be related to Application Cache. Clearing this cache forces the application to reload the data from the backend and may temporarily increase the page load times in your Jive community until the resources are cached again. For this reason, it is advised to perform this during non-peak usage hours.
For hosted or on-premise instances, you will need to have at least the Manage System permission to clear Application Cache. For Cloud instances, please contact us to perform this step.
- Navigate to Admin Console > System > Settings > Caches and under the Cache Performance Summary, select the checkbox on top of the table to select all caches.
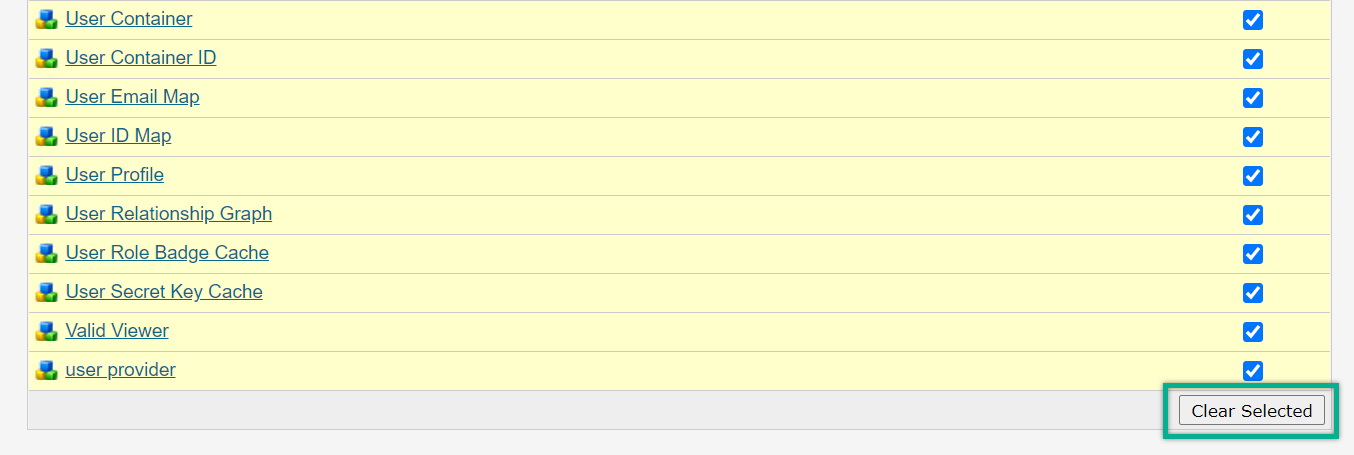
- Scroll down to the bottom of the page and select the Clear Selected button.
Testing
After following the steps in the solution section, you should be able to see the correct number of followers for the affected Space.


Priyanka Bhotika
Comments