Overview
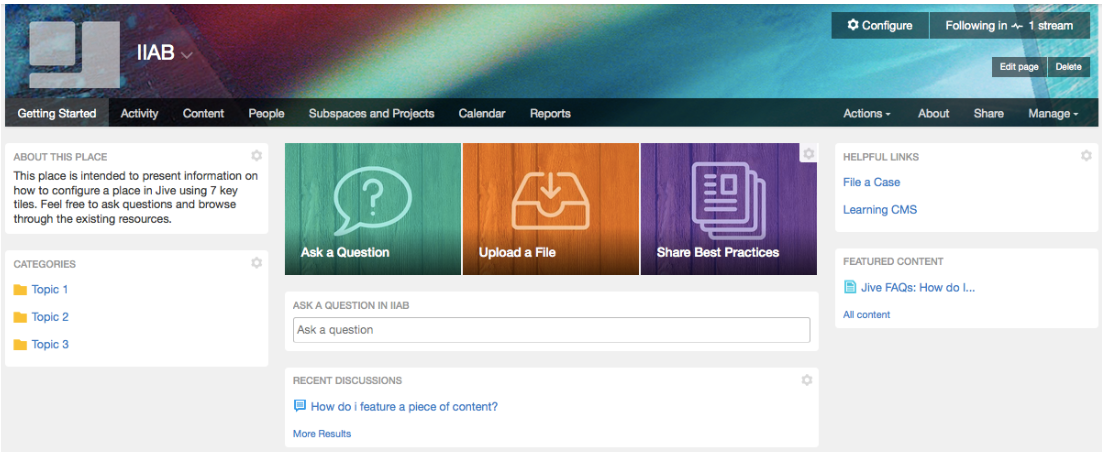
This document highlights the use and configuration of a few of the most popular and useful tiles in all versions of Jive. These tiles are small containers that can be configured and surfaced on pages through some simple metadata changes. Tiles are responsive and mobile friendly.
Content
Which tiles should I use?
It allows you to provide a content hierarchy in your place, and give users an easy filtering tool without creating additional site structure or complexity. Think of categories as topic-based, content filtering.
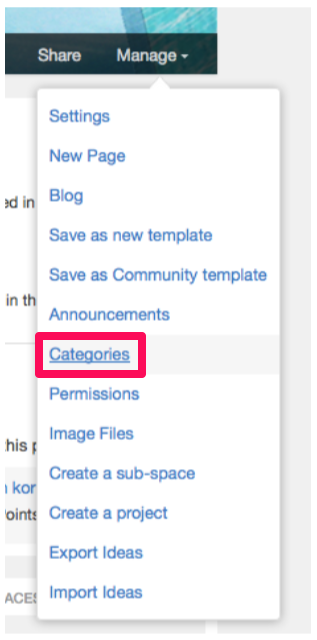
Before configuring this tile, make sure that you’ve created the necessary categories in the Manage dropdown.
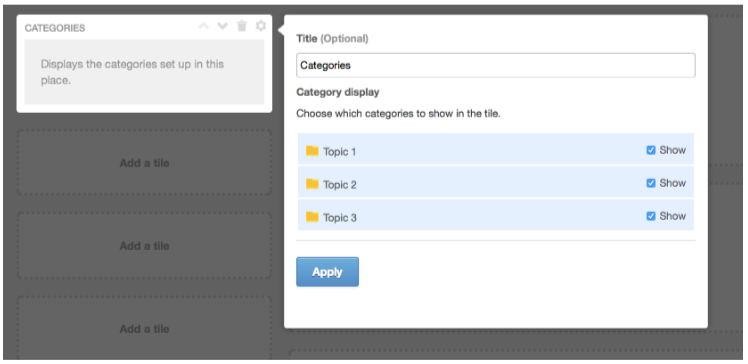
Once selected, you can edit the title of the tile and even pick and choose which categories you’d like surfaced in this iteration of the tile. Click Apply.
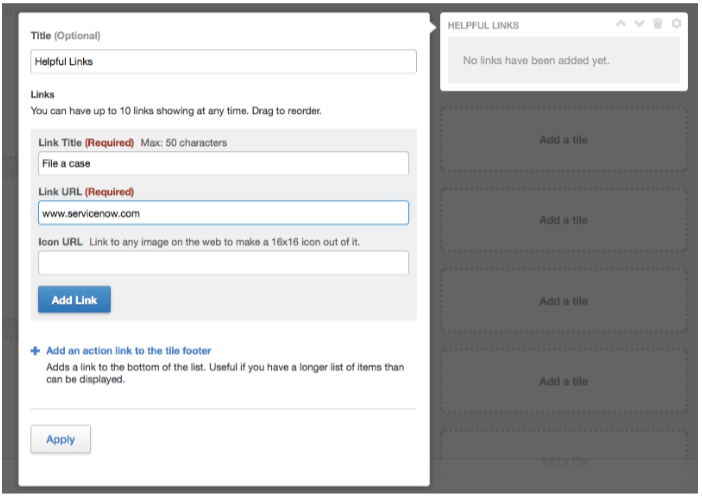
It is intended to be used for offsite URLs, like Ticketing Systems, Content Management Systems, Payroll Platforms, etc. It also supports a small image next to the link; so consider providing image URLs when using this tile to add a visual element to the page (your image URLs can point to an image on your Jive site, or to anywhere on the web.
Tip: you can embed images in a Jive doc, convert to HTML, then grab the URL).
Be sure to click Add Link for each individual entry (up to 10), then click Apply when you’re done configuring.
Having visual Calls to Action on your page is a crystal-clear way to tell users what you want them to do in this place. Consider these to-dos before you configure this tile:
- Do you want users to ask questions?
- Share stories or best practices via blog posts?
- Upload a file?
Three to five calls to action is the ideal number. Once you know your calls, you can start to configure this tile:
- We recommend having two tabs or windows open for this configuration to assist with copying URLs.
- Have images ready to upload against the corresponding Call to Action
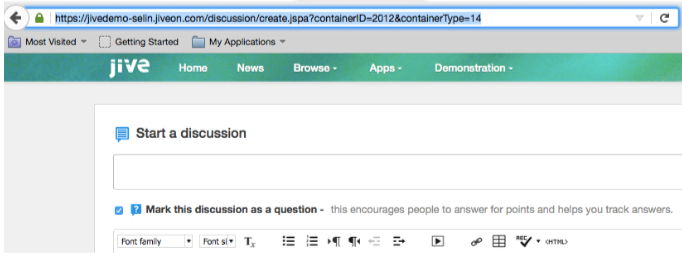
- If Ask a question is one of the calls, create a discussion in the designated place, and grab the URL.
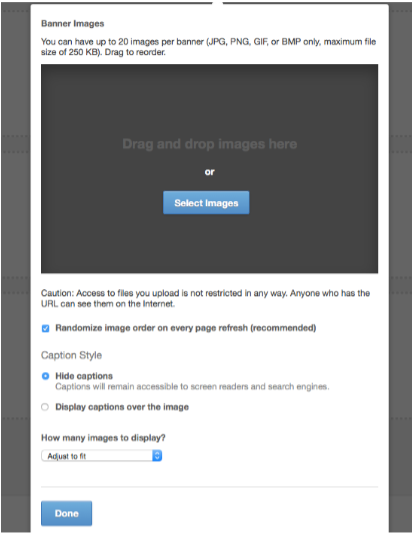
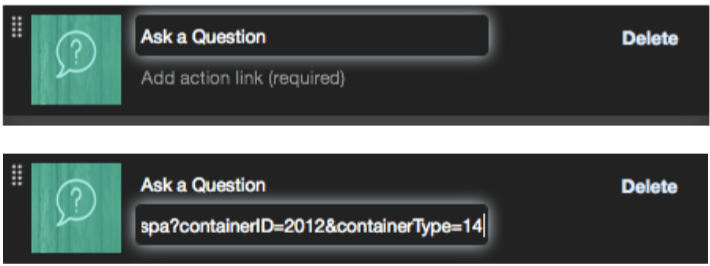
First, click Select Images. Then add in action text and the URL.
Continue to add images (and their text and links) until all of your calls to action are accounted for. In the metadata options, uncheck Randomize and uncheck the option to Hide Text. Then click Done.
Do this for all of the calls you plan to have on the page.
It provides the place admin with the opportunity to grab content that is trending, important, needs to be surfaced in a place to lock it down and feature it. Additionally, it's very easy to add and remove content from the featured content tile.
Common uses of a feature content tile:
- Frequently Asked Questions (you can rename the tile, and only feature discussions/questions).
- Key resources that users frequently come to this place for.
- Hot or trending content.
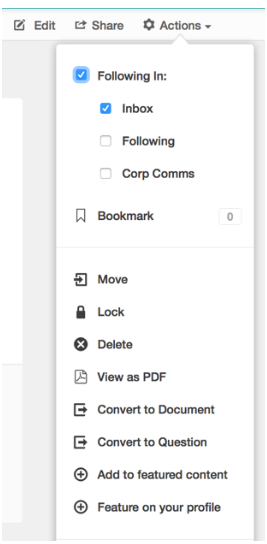
Find the content you’d like to feature, and feature it by clicking on Add to featured content in the Actions drop-down on the actual content page.
Your tile will be automatically updated on the landing page!
It does a light search based on the text the user enters to see if pre-existing questions on that subject already live in the place. If they do, they’ll surface in the results.
If nothing matches, the user will be prompted to continue and ask their question- which will land them on a Create Discussion page.
It helps you to present signs of life on your landing page. It can be configured to surface a list of new users and new content (including specific types). Think about using it to highlight recently joined members of a group, latest discussions, most recent documents or ideas - basically anything you’d find in the content tab of your place.
- We recommend having another tab or window open to help with configuring this tile.
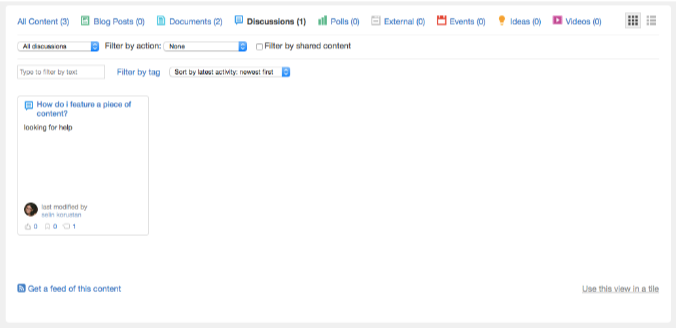
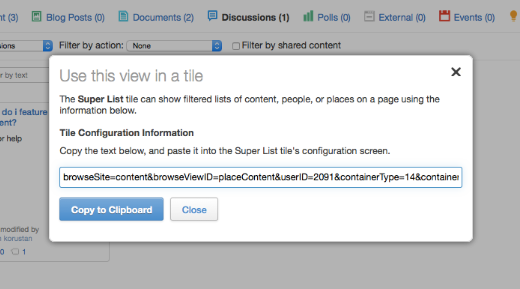
First, you’ll need to decide what you’d like to have surfaced in this tile. If it’s recent discussions, go to the Content tab of your place, and filter down the results to just discussions. You can take this a step further and filter by discussion type or apply categories. When the display reflects what you want for the Super List tile, go to the bottom right corner and click on Use this view in a tile.
Copy the URL presented in the pop-up box.
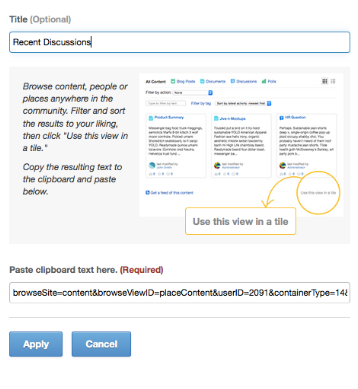
Paste that URL into the Super List tile, and consider renaming the tile to reflect exactly what users will see rendered in it. Like Latest Documents or Recent Discussions. Then click apply. This tile will be dynamically populated as new qualifying content is added.
It is an excellent way to surface a nicely formatted document in the community within a tile on the landing page. All of the functionality you can leverage in a document, including links, images, tables, and videos, can be surfaced on the landing page using this tile.
Common uses of the View Document tile:
- Surfacing beautiful graphics on a page
- Surfacing a formatted native document on a page
- Granting someone authorship permission on a specific document will give them the ability to control one part of the landing page without giving them full admin permissions
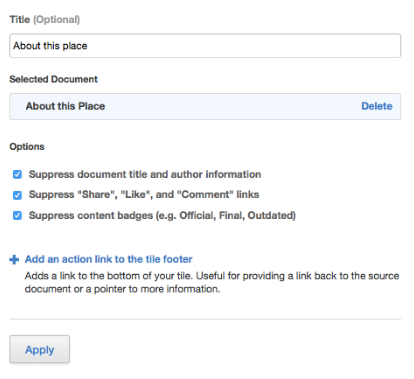
Once selected, you can change the name of the tile if you like, or suppress it, but more importantly, link the tile to the document you’d like to surface here - in the Selected Document field. Then be sure to suppress all three document options, before clicking Apply.
Consider exploring some of the other default tiles like Expandable Sections, Latest Blog Posts, and Carousel to help add breadth to your pages on your Jive site.



Priyanka Bhotika
Comments