Overview
This article provides the process for assigning permissions on a 'Social Group' to a user group not having those already. The article also provides the procedure for editing such permissions for a user group which already has those assigned.
Solution
You can assign permissions on a 'Social Group' to a group of users, which makes the process - of having to do it for multiple users - faster and easier. Please note that the user group must exist before you can assign it permissions.
Note: Social Group permissions determine whether or not users may read or create social groups. These permissions apply system-wide. You cannot modify permissions for individual social groups.
To set up permissions for a user group on a social group:
- Navigate to Admin Console > Permissions > Social Group Permissions.
- On the Permissions For: <social group> page, under Groups with access, review permissions for user groups, and:
- To assign permissions to a user group not yet listed, you:
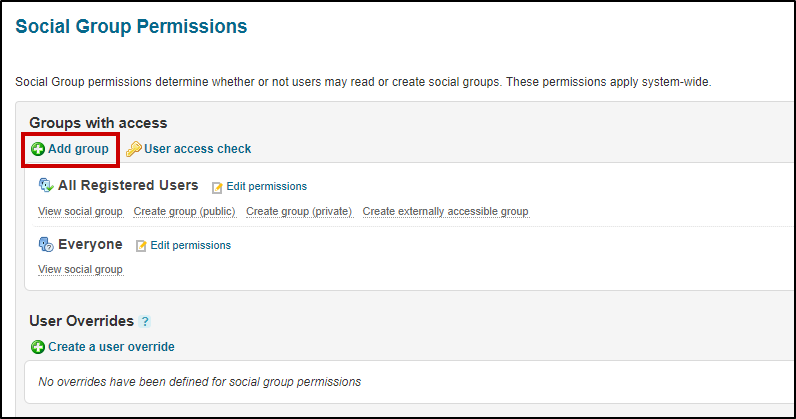
- Click Add Group
- Enter the name of the user group to add.
- Click the Select Permissions button.
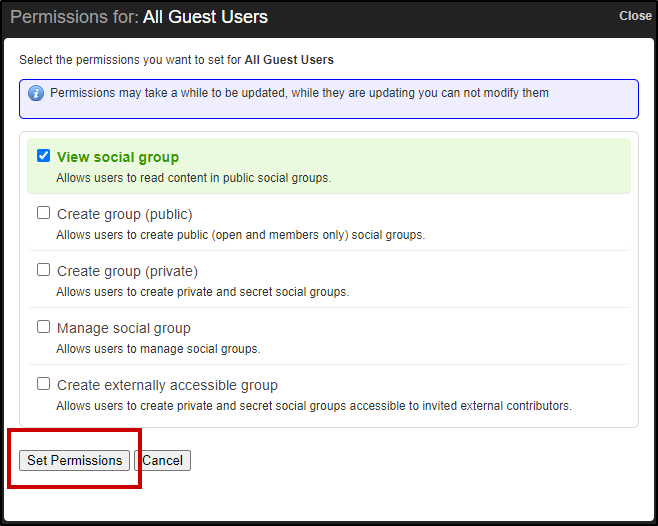
- Select or unselect checkboxes (in the Social Group Permissions for <user group> dialog box) for the permissions you want to apply or remove respectively. Then click on Set Permissions
- Click Add Group
- To edit permissions for a user group already listed, you:
- Locate the group in the list.
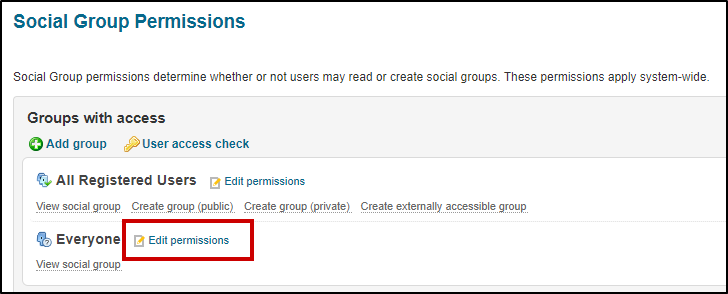
- Click Edit Permissions, next to the group's name.
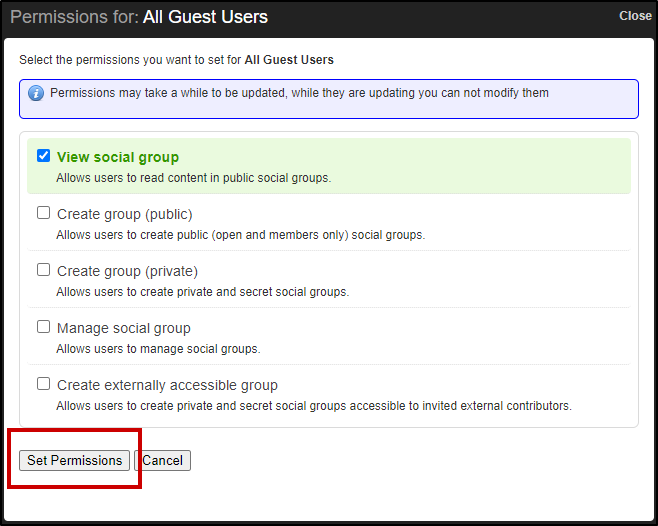
- Select or unselect checkboxes (in the Social Group Permissions for <user group> dialog box) for the permissions you want to apply or remove respectively. Then click on Set Permissions
- To assign permissions to a user group not yet listed, you:
Confirmation
The desired user group gets the applied permissions.


Priyanka Bhotika
Comments