Overview
This article outlines the process for Jive Cloud and Hosted customers to follow if you would like to export a database dump of all of your data and files from Jive. This type of request is referred to as a data dump. This would contain a copy of your entire Jive database and all binstore files (includes images, files, and any other attached content). You may want this if you are ending your account or if you want a local backup for disaster recovery or compliance purposes. This article describes the steps needed to obtain a data dump from Jive Support.
Information
<supportagent>
For data dump requests from Cloud & Hosted customers, agents should follow steps from the V2 - Processing a Request for a Data Dump for a Cloud or Hosted Instance article.
</supportagent>
Jive customers may be entitled to one free data dump after your contract ends or near the contract expiry date if your current contract includes this. Your contract may also have additional dumps included while your contract is active if specifically arranged for. To request any additional data dumps, please contact your account executive/account manager, or create a Support ticket for further assistance.
The contents of a Jive data dump will be delivered in several tar.gz files to help with the download. For reference, here's the list of compressed files that are included in the data dump:
- 4flowAG-binstore_X.tar.gz
- This will contain all binary files stored in your instance, including documents, images, attachments, etc.
- Please note that the binary files are not stored in the usual formats, but with the .bin extension; they can be retrieved using the method listed in Finding a File in Jive's File Storage System
- 4flowAG-analytics.tar.gz
- This will contain a dump of your instance's analytics.
- 4flowAG-coredb.tar.gz
- This will be a dump of the main database of your instance.
- For reference, the databases are for PostgreSQL. You may restore them either by pgAdmin (GUI) or by using PSQL CLI.
- The database schema is identical to Jive Hosted/On-Premise.
Obtaining a data dump is a two-step process:
- Find your IP address
- Create a Public Key file and request the database dump from Jive Support
- Download the database file via SFTP
1. Find your IP Address
The easiest method of finding what is the IP address you use to surf the Internet, go to the website checkip.amazonaws.com:
Your IP address will be the only text on the page. You can try also ipinfo.io/ip in case the above service does not work for any reason.
Providing the private IP address of your computer (in the ranges of 192.168.x.y, 10.x.y.z, or 172.16.0.0 – 172.31.255.255), will not work as these are internal IP addresses, except special cases in which there is a private network (or a VPN) between Jive and your company.
If you will download the files on your machine, you do not need anything else and your IP address, in CIDR Format, will be in the form <IP>/32. For example: 101.102.103.104/32.
If you will download the files from a different machine (for example, from a server) you will need the IP address of the server, and not yours. In case you are still not sure, please provide the IP address range of your company (always in CIDR format, meaning <IP>/<Bitmask>). Ask your IT or Network department if you are unsure.
Take note of your public IP address, because you will need to provide it to support in the next step.
2. Create a Public Key file and request the database dump from Jive Support
-
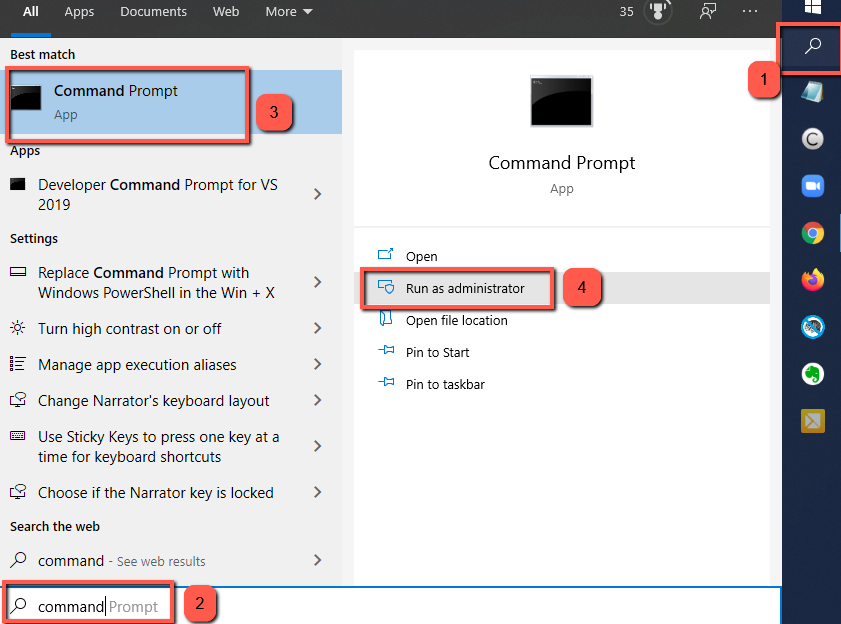
Open a command prompt:
-
On Windows 10, open a command prompt by selecting the spotlight search icon, type command, then select Run as Administrator:
-
On macOS, choose the spotlight search icon, type in terminal, then select the Terminal utility.
-
-
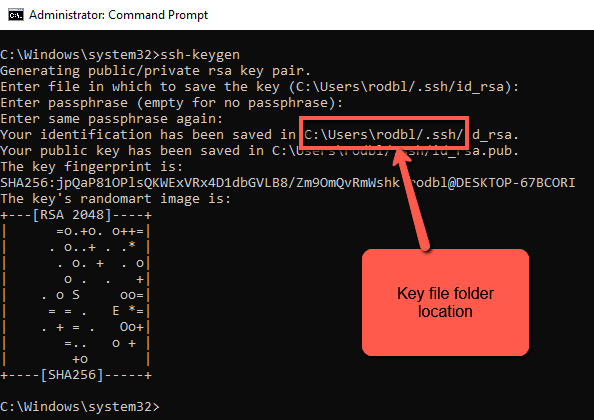
The procedure to generate the public/private RSA key pair from this point on is virtually identical on macOS/Windows. To begin, type
ssh-keygen, then pressEnter, then pressEnteragain to accept the default filename.
Note: If you are running Windows 10 and thessh-keygencommand is missing, then follow these instructions from Microsoft to install it via PowerShell. -
Enter a passphrase,
Enterthen confirm it, andEnteragain.
-
The RSA key pair will now be generated. If you didn't specify a filename during the file generation process, the public key file will be called
id_rsa.puband the private key file will be calledid_rsa. Note the location of the folder where the files have been saved.
-
Locat the key that was just generated:
-
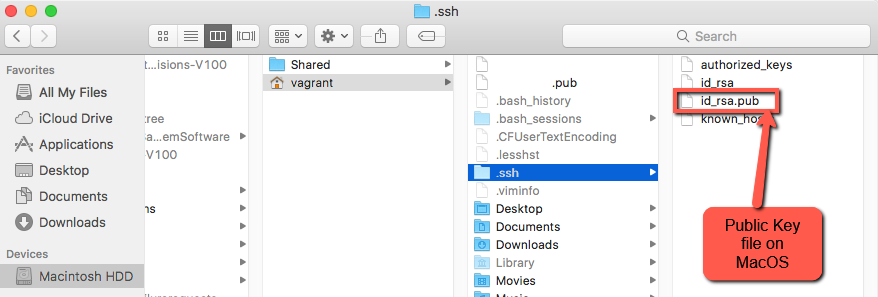
On macOS, to locate the public key file in Finder, first, navigate to the user directory, then press Command + Shift + Period to instantly toggle on/off hidden files/folders. Then you can look inside the
<username>/.sshfolder. The default public keyfile isid_rsa.pub.
-
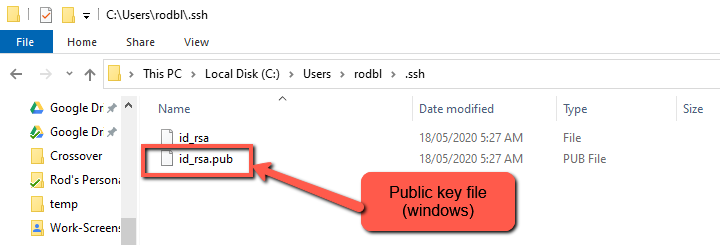
On Windows, you can navigate to the key file through File Explorer by typing in the variable path
%USERPROFILE%/.sshto the address bar, then press Enter.
Note: If you chose your own filename in Step 3 without specifying the full path, such as/Users/<username>/.ssh/mykeyfile, then files will be created in the current working directory, such asC:\windows\system32(on Windows) or/Users/<username>(on Mac).
-
-
Once you have your public key generated, contact us and provide the below information as a part of the communication:
-
The domain name of your Jive instance.
- The IP address you found at the previous step
-
Attach your public key file to the message
Note: Please make sure you are only sharing the public key (.pub extension) with the ticket. The private key is not required.
-
State if you would like a copy of just the database, or the binstore files as well (uploaded images, documents, etc).
-
3. Download the database file and binstore contents via SFTP
Jive Support will respond in due course with details for downloading the database dump and binstore tarball, including the address of the SFTP server and the username. These details will be required, in conjunction with the private key file that you generated earlier.
To download the files via SFTP, we suggest that you use Filezilla. Then follow the procedure below, depending on your operating system:
Download procedure for macOS
-
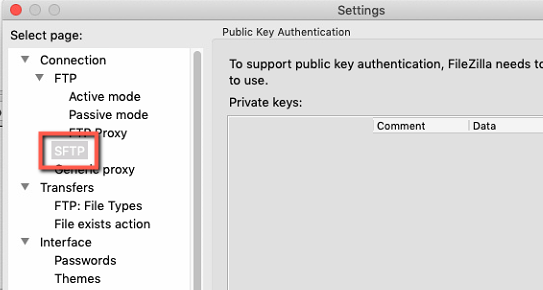
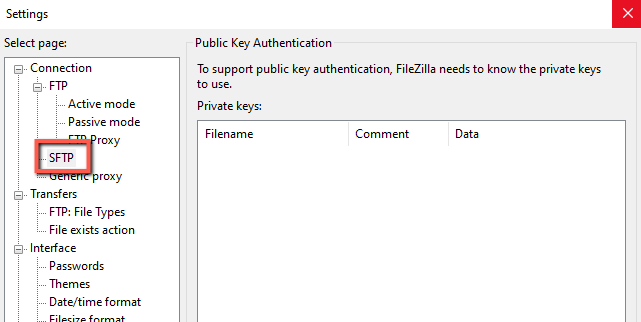
If you specified a password when creating the key files, you will first need to convert the private key file to a .ppk format so that FileZilla can read it. If you did not specify a password, you can skip straight to Step 5 to create a new site in FileZilla and use the key file as-is. To begin, open FileZilla, then choose FileZilla → Settings, then select Connection → SFTP
-
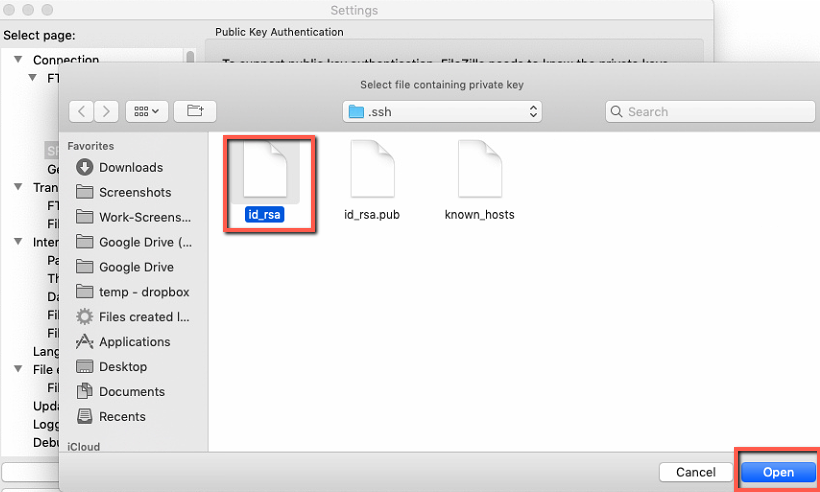
Press the Add key file... button, then press Command + Shift + G to bring up a path selection window, type
~/.ssh, then select the id_rsa file and click Open.
-
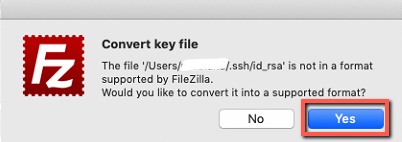
A dialogue box titled Convert key file will pop up. Click Yes to convert and make a new file in the .ppk format, then enter the password you used when creating the files earlier on, then click OK
-
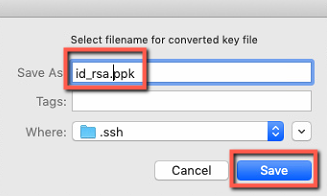
Choose a filename for the converted file, then click Save, then click OK a final time to return to the main FileZilla window.
-
Now create a new site by choosing File -> Site Manager, then click the New site button
-
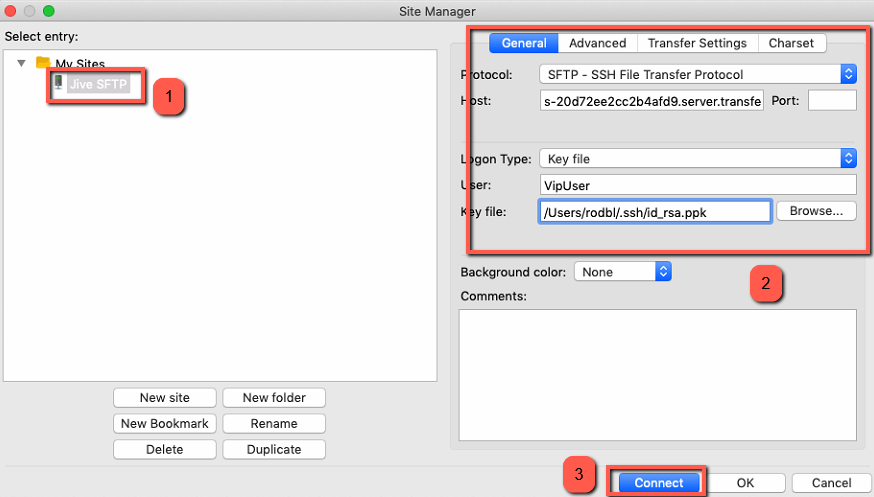
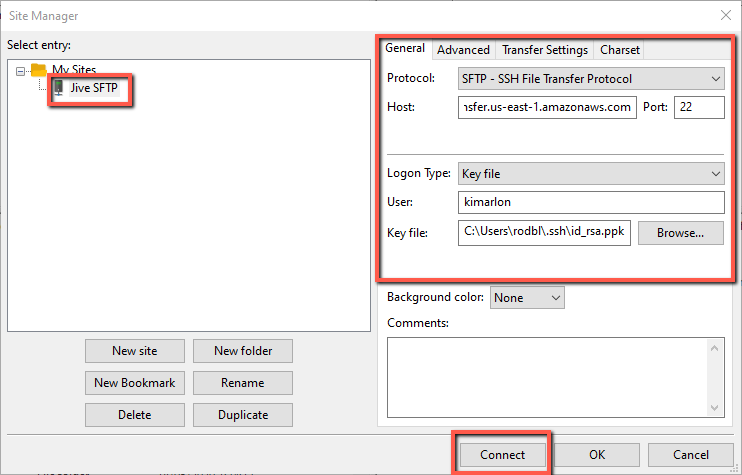
Configure the site with the details below, and replace
<hostname>and<username>with those provided to you by Jive Support:Protocol: SFTP - SSH File Transfer Protocol Host: <hostname> (without any ftp:// or sftp:// prefix) Port: 22 Logon type: Key file User: <username> Keyfile: Click the Browse button and navigate to where the .ppk key file created in step 6 is located (if you used a password), or simply select the id_rsa file.
-
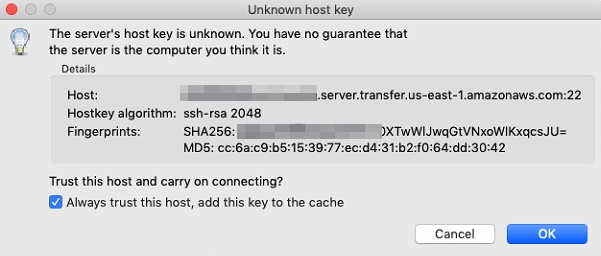
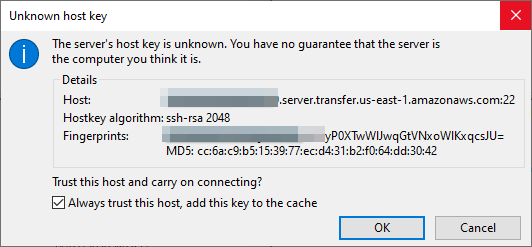
Click Connect, then click OK to confirm the unknown host key if this is your first attempt.
-
Now you can proceed to download the database files to the local computer.
Download procedure for Windows
-
If you specified a password when creating the key files, you will first need to convert the private key file to a .ppk format so that FileZilla can read it. If you did not specify a password, you can skip straight to Step 5 to create a new site in FileZilla and use the key file as-is. To begin, open FileZilla, choose Edit → Settings, then select Connection → SFTP
-
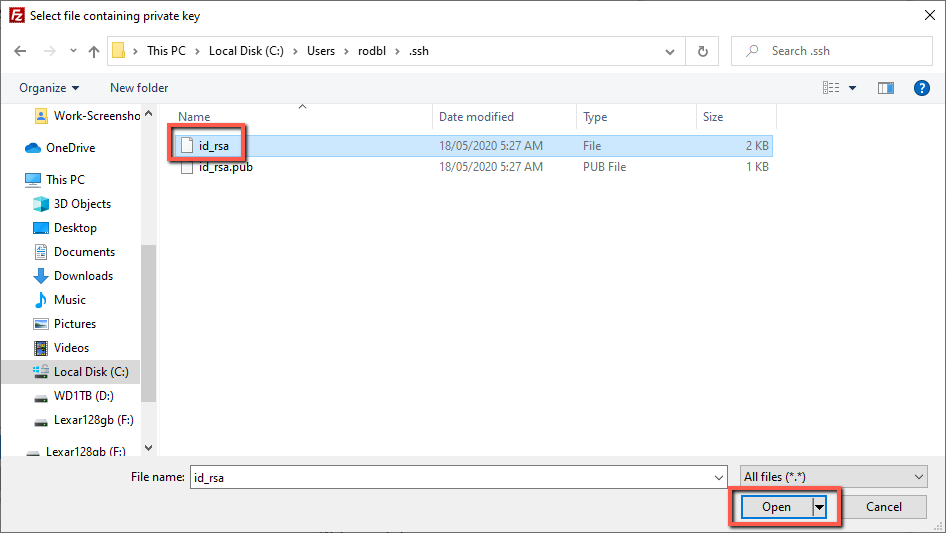
Press the Add key file... button, then enter
%USERPROFILE%/.sshpressEnter, then select the id_rsa file and click Open.
-
A dialogue box titled Convert key file will pop up. Click Yes to convert the file to a format supported by Filezilla, then enter the password you used when creating the files earlier on, then click OK
-
Choose a filename for the converted file, then click Save, then click OK a final time to return to the main FileZilla window.
-
Now create a new site by choosing File -> Site Manager, then click the New site button
-
Complete the details below, and replace
<hostname>and<username>with those provided to you by Jive Support:Protocol: SFTP - SSH File Transfer Protocol Host: <hostname> (without any ftp:// or sftp:// prefix) Port: 22 Logon type: Key file User: <username> Keyfile: Click the Browse button and navigate to where the .ppk key file created in step 6 is located (if you used a password), or simply select the id_rsa file.
-
Click Connect, then click OK to confirm the unknown host key if this is your first attempt.
-
Now you can proceed to download the database files to the local computer.





Priyanka Bhotika
Comments