Overview
Debugging webhook requests is always a difficult task for a developer, considering the multiple webhook requests and events that follow the webhook request developers resort to sending emails or saving the contents to files or using a third-party service for debugging.
Here, we are going to discuss debugging a webhook request with the help of WebHook App. An app that helps to create multiple hooks with different URL’s and shows the requests to that URL in real-time and to save and examine the received request in future.
This article highlights the different steps useful for debugging webhook requests using the WebHook App.
Environment
Jive Cloud
Process
Step 1: Create a WebHook App Account
- Go to WebHook App and sign up for using this service.
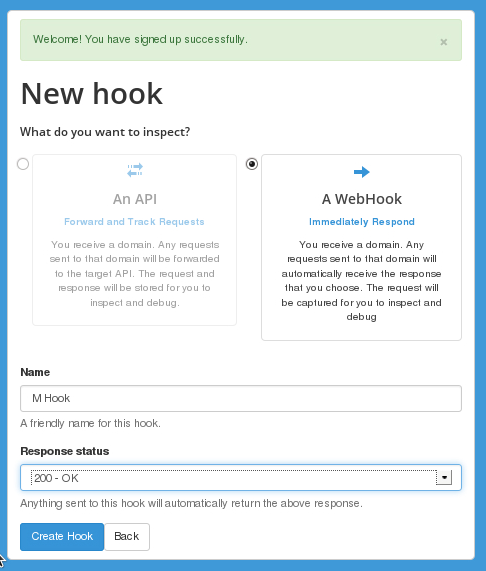
- Select A WebHook from the New hook menu.
- Fill in the details and click Create Hook. (e.g., Name: M Hook)
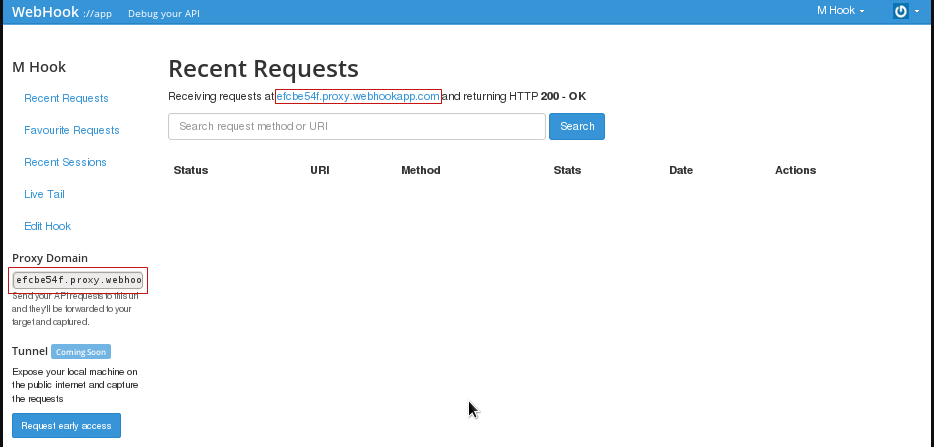
- Now, the WebHook account is ready to receive requests at this URL: e.g.,
efcbe54f.proxy.webhookapp.com. Copy the URL, and you are done.
Step 2: Sending a cURL Request to the URL
- Now, we access the URL
efcbe54f.proxy.webhookapp.comfrom our page with a cURL request to this URL.
Here is the sample PHP code used to send cURL request:
function debugWebHook($debugArray)
 {
 $ch = curl_init('12345678.proxy.webhookapp.com/');
 foreach($debugArray as $key=>$value) { $fields_string .= $key.'='.$value.'&'; }
 rtrim($fields_string, '&');
 curl_setopt($ch, CURLOPT_POST, 1);
 curl_setopt($ch, CURLOPT_POSTFIELDS,$fields_string);
 curl_setopt($ch, CURLOPT_RETURNTRANSFER, false);
 curl_setopt($ch, CURLOPT_HEADER, 0);
 $data = curl_exec($ch);
curl_close($ch);
 return;
}
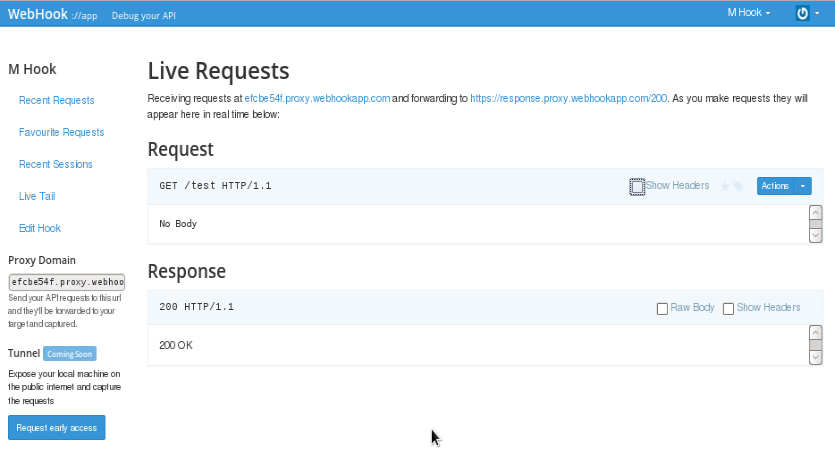
- Now, check out the Live Tail option on the left-hand side to get the real-time view of received requests.
You will temporarily see the following message until the requests are displayed:
Receiving requests atefcbe54f.proxy.webhookapp.comand forwarding tohttps:///response.proxy.webhookapp.com/200. As you make requests, they will appear here in real time below:
Waiting for requests
E.g., See the below screenshot with the received Request and Response.
Related Information
To know more about this topic, you can visit Cubet Tech - Contact Us


Priyanka Bhotika
Comments