Overview
<supportagent>
Support Agents: Steps on how to make changes to a customer's IP restriction list are described in the solution section.
</supportagent>
Jive customers can set up an IP address restriction list in order to control access to their community at the IP address level.
When this type of restriction list is in place, users trying to access your Jive instance from an unauthorized IP address will receive a 403 error.
The restriction list can be either a whitelist or a blacklist:
- A whitelist is used to specify a list of IP addresses that will be able to access your community. All other addresses will be blocked.
A blacklist is used to specify a list of IP addresses that will not be able to access your community. Any IP address that is not included in the list will be allowed access.
Updates to the restriction list can be made in bulk or individually.
This article provides information on how to enable, or make changes to, an IP restriction list for your community.
Information
<supportagent>
Support Agents:
- Locate the instance by searching the JCA using the customer name and the ticket information to determine which instance the restriction list change should be applied to.
-
Enable IP Restrictions on Jive by making sure the Enable JCA (JCX for AWS) management of restrictions setting is checked.
- In the IP Restrictions section, click on Edit.
- If the restrictions were not enabled before - ensure you select the proper Header type and restart the instances (a rolling one should work, the webapp nodes need to be restarted) to have the updated configuration picked up.
- The next steps will depend on the request you are processing:

Adding an IP Address Rule
- Click on Add entry in the "IP restrictions for: /" section.
- Type in the new IP address rule in the textbox that appears.
- Click on the Save button.
Removing an IP Address Rule
- Search the CIDR formatted IP ranges section for the IP address rule that needs to be removed.
- Click on the Remove link on the left side of the IP address rule.
- Click on the Save button.
Replacing the Entire List of Rules
- In the "IP restrictions for: /" section, click on Remove all entries.
- In the Bulk entry of restrictions textbox, paste in the contents of the file the customer provided.
- Click on Save.
</supportagent>
Setting up and updating an IP restriction list for your community is done differently based on your instance type:
Jive Cloud
Please request additions or changes to IP address restrictions for your Jive community by contacting us. Please include the address of the Jive instance and the full list of IP addresses that you need to add or remove in the CIDR notation format.
Jive On-Premise
Please contact your network administrator to configure IP address restrictions, as they are typically performed at the load-balancer or firewall level.
Jive Hosted
Self-service IP restriction setup and maintenance is available through the Jive Cloud Admin (JCA) tool. For details on accessing the JCA tool, see the article How to Access Jive Cloud Admin (JCA).
If you prefer to contact us, please include the address of the Jive instance and the full list of IP addresses that you need to add or remove in the CIDR notation format.
The following sections outline how to set up and maintain an IP restriction list using the JCA:
- Accessing the IP Restrictions page to set up or maintain the restriction list
- How to add a new IP address restriction
- How to add or replace IP restrictions using an uploaded file
- How to remove any existing IP Address restriction
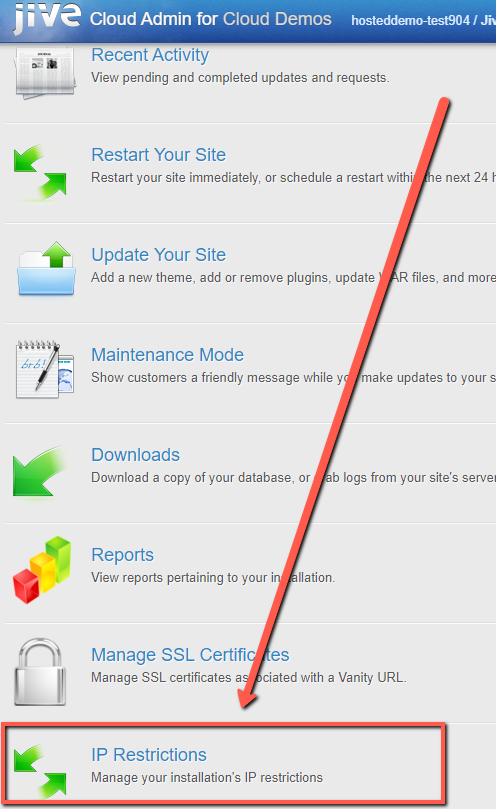
Accessing the IP Restrictions page to set up or maintain the restriction list
-
Login to Jive Cloud Admin, then click IP Restrictions.
-
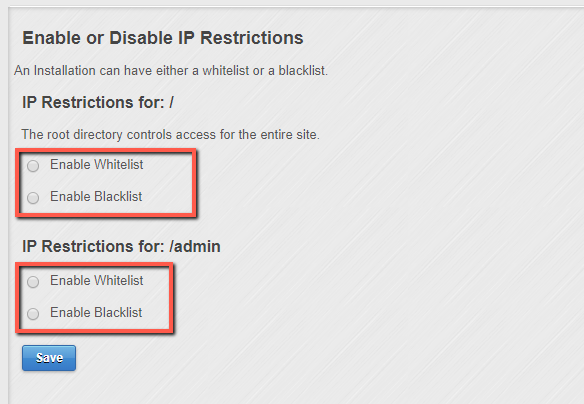
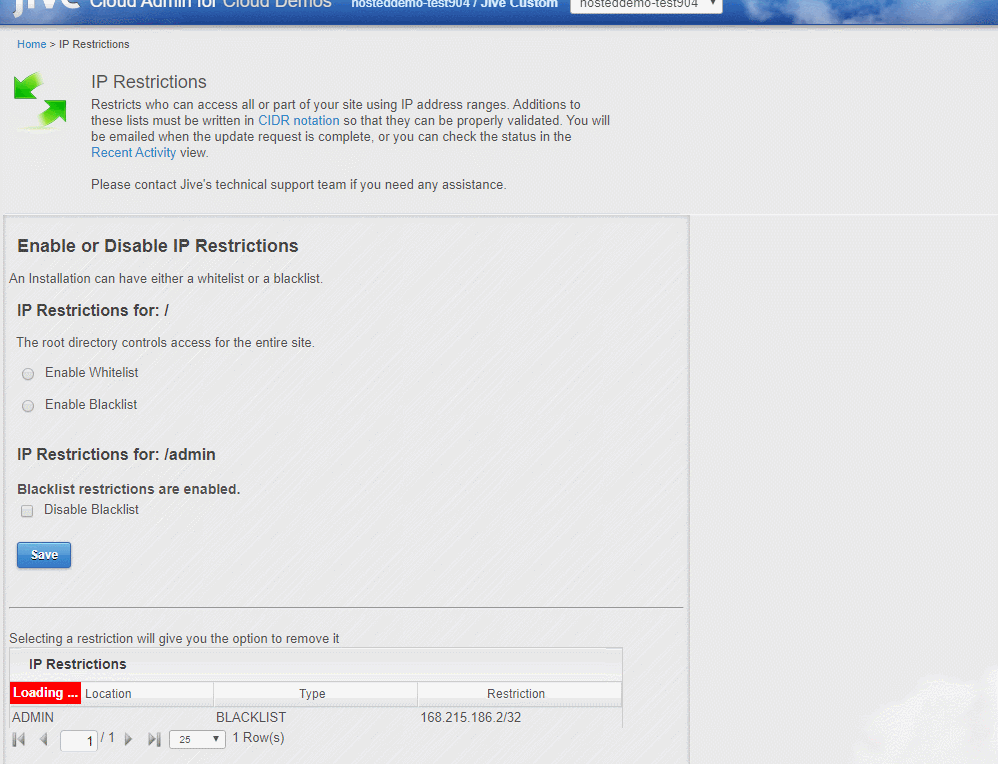
If you have not previously configured a whitelist or blacklist, then choose an option for the entire site
/or just the/adminsection, then click Save.Warning: Be careful with theEnable Whitelistfor/option. Once you click Save, it means ALL IP Addresses are blocked from accessing your Jive community until you have added one or more IP addresses to the whitelist. Consider using the Enable Blacklist feature instead.
How to add a new IP address restriction
-
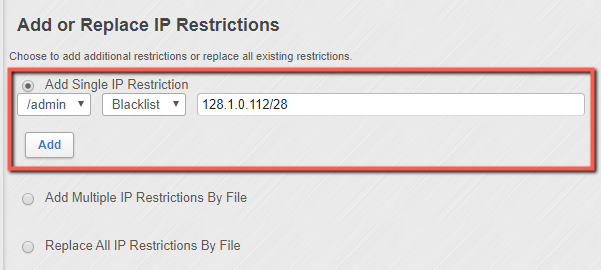
Select the option to
Add Single IP Restriction(to add a single IP or subnet). -
To add a single IPv4 address or range, enter the IP to the field in CIDR notation, making sure that you select the desired option for
/adminor/andWhitelistorBlacklist, then click Add. An example of a single IP address is128.1.0.22/32. An example IP range is128.1.0.112/28, which represents the sixteen IP addresses in the range 128.1.0.112 - 128.1.0.127.Note: IPv6 addresses are only supported for Jive Cloud customers and must be requested by lodging a ticket on the Jive Support Portal with the subjectAdd/update IP address restrictions. Also, private IP addresses in the ranges listed below are not supported:List of Unsupported Private IP Addresses Range Support Status 10.0.0.0 - 10.255.255.255 Not Supported 172.16.0.0 - 172.31.255.255 Not Supported 192.168.0.0 - 192.168.255.255 Not Supported
How to add or replace IP restrictions using an uploaded file
Multiple IP restrictions can be uploaded in a plain text file to replace all existing restrictions as shown in the image below or add to the existing restrictions. Each line must contain an IP address or range in CIDR notation. Once again, make sure that you select the desired option for /admin or / and Whitelist or Blacklist, then click Upload.

How to remove any existing IP Address restriction
To remove an existing restriction, select it from the list, then click the Remove button in the pop-up dialogue box.
Related articles
Read the following articles for more information on resolving common issues with configuring IP address restrictions:
Priyanka Bhotika
Comments