Overview
Once you have obtained your DB download, you will need to restore it in order to use it and access any information contained within. You can use either of the following methods interchangeably:
- Via pgAdmin (Postgres)
- Via CLI (Command Line Interface)
NOTE: Just because you use pgAdmin to restore a database, does not mean you cannot use the CLI later to do so.
This article describes the step-by-step process to restore a database download via pgAdmin.
Solution
This guide was written for the Mac OSX release of Postgres/pgAdmin; however, the steps are identical for Windows or Linux. You can download pgAdmin from the official pgAdmin website. This procedure assumes that you already have a local (or remote) PostgreSQL server up and running, which is outside of the scope of this article.
- Open pgAdmin.
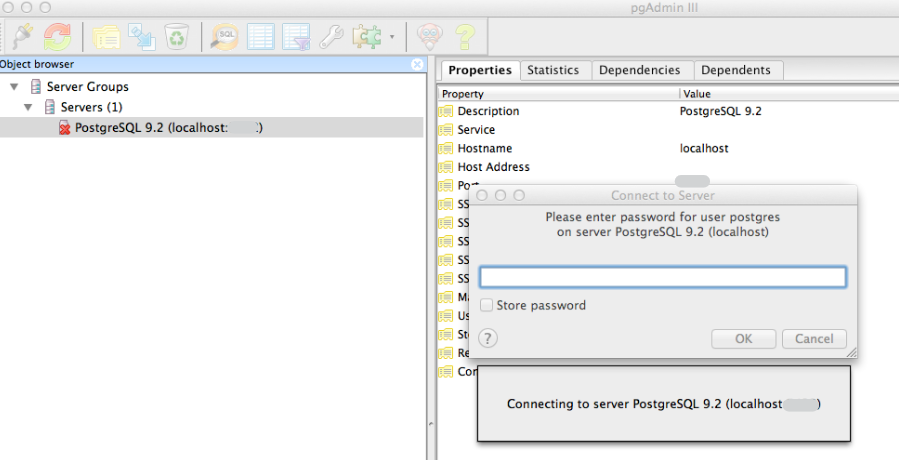
- You will notice that your local server is listed, but has a red X
over it.
- This is normal, and simply indicates that the server is currently not connected:
- You will notice that your local server is listed, but has a red X
- Double-click on the server to connect to it. Alternatively, you can add your remove server, if your database is not on your local machine.
- You will be prompted for a password. This is the password you created when you initially installed Postgres.
- You will be prompted for a password. This is the password you created when you initially installed Postgres.
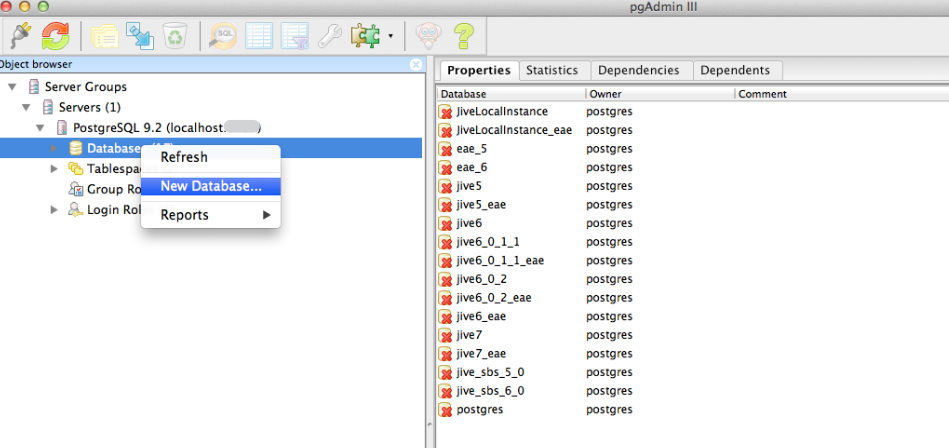
- Once you are connected to the server, you will see several elements. To do this, right-click on Databases > New Database:
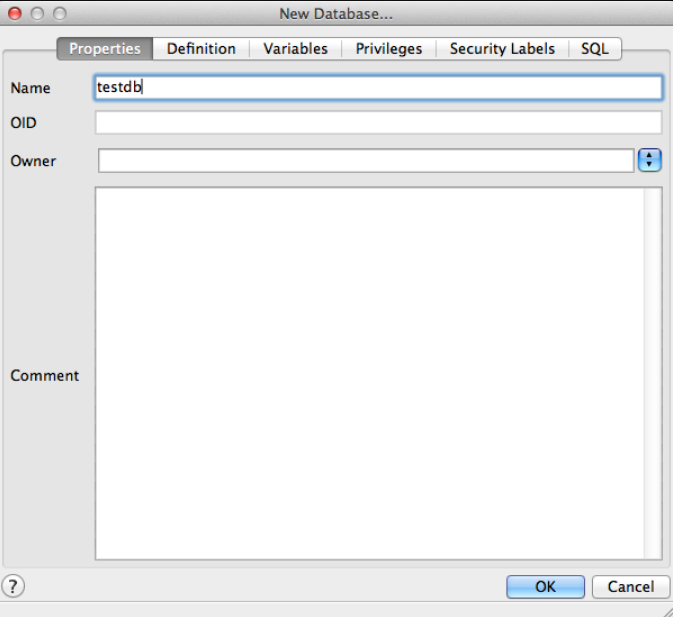
- In the pop-up dialog, enter the Name of the new database in the name field, then click OK.
- You can name it whatever you would like.
- The other fields are not required for a basic install and are outside the purview of this guide.
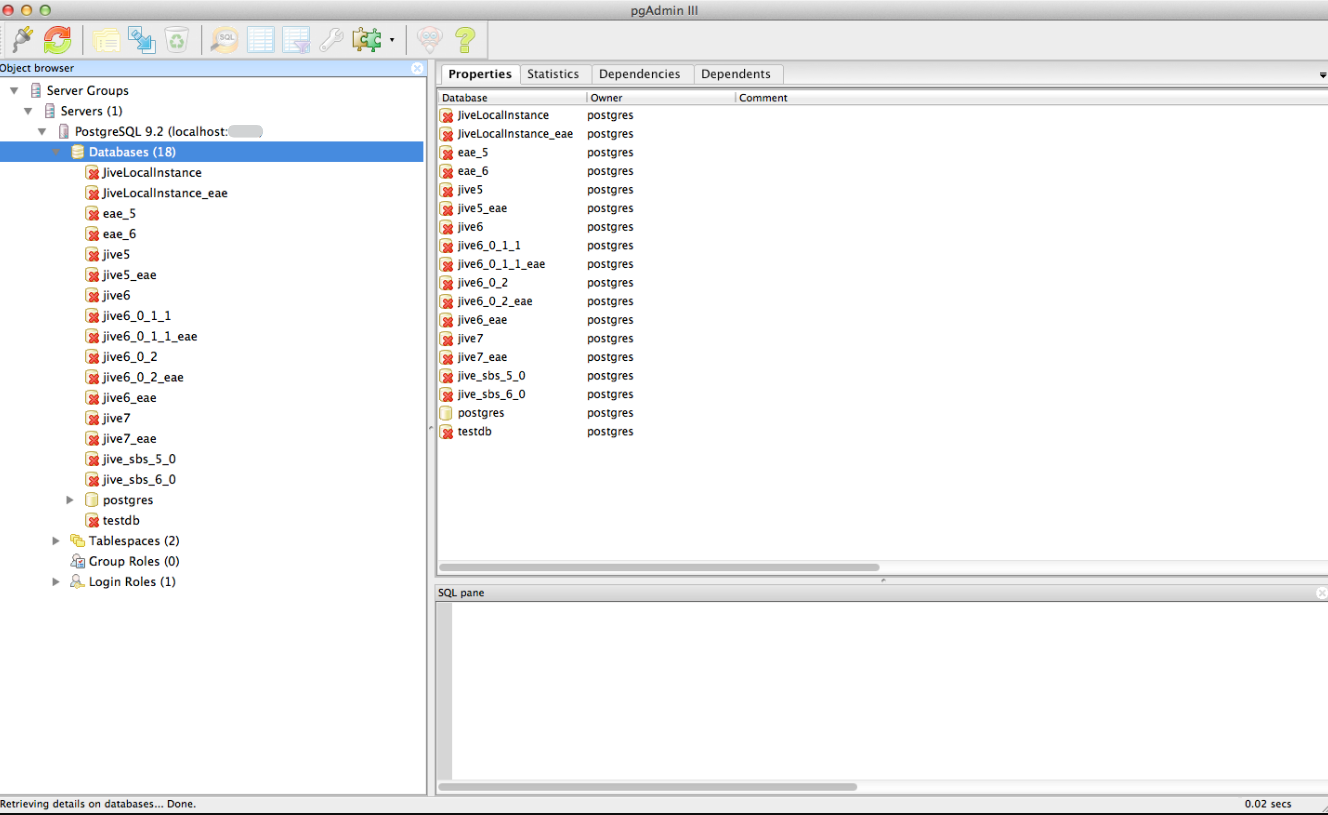
- Once you have created the database, the Databases list opens, and you will see all the databases currently available on this server, including the one you just created.
- If you are running a fresh install, you will only see Postgres (the default database) and the database you have just created.
- The databases will also be designated with a red X
 indicating that they are not currently connected. This is also normal, and you will only need to click on them once to re-connect.
- You can name it whatever you would like.
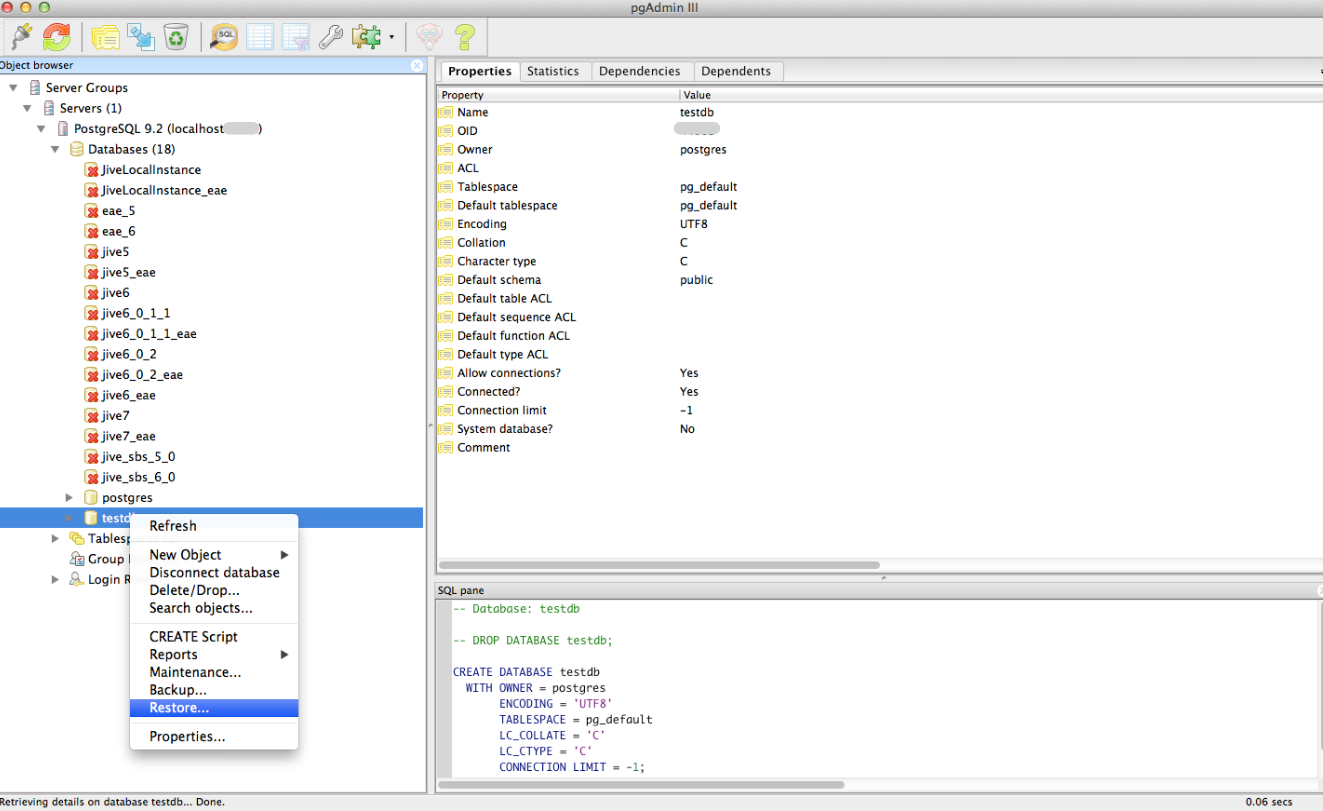
- Right-click on the database you have just created, and select Restore.
NOTE: If you have not already clicked on your database, once you right-click, the is removed.
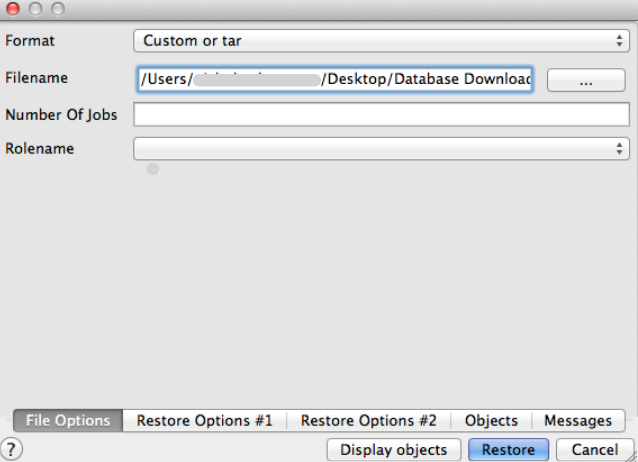
- In the pop-up dialog window, leave the Format field set to
Custom or tar(the dumps provided to you are in Custom format).
- Enter the path to the dump file you downloaded in the Filename field, or use the ellipsis button (...) to browse to the file using the Finder (OS X)/ Windows Explorer (Windows), then click Restore.
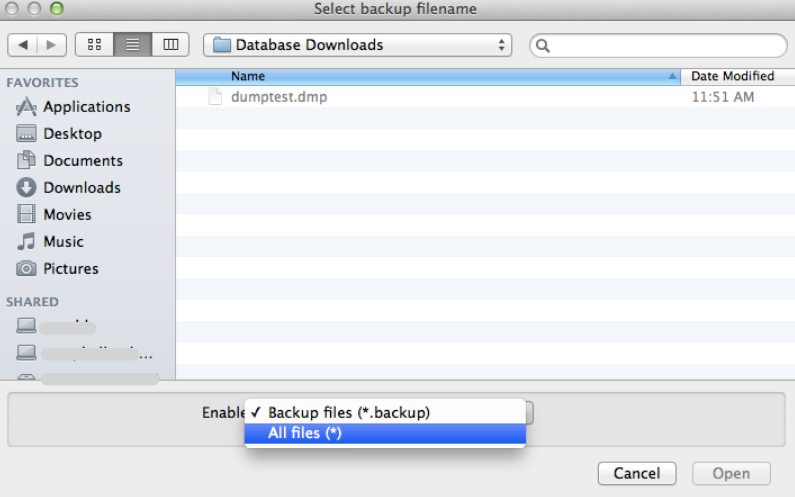
- If you are browsing the file using the ellipsis (...) button, you may need to choose All files under Enable to be able to select your .dmp file.
- If you are browsing the file using the ellipsis (...) button, you may need to choose All files under Enable to be able to select your .dmp file.
- Before you start the Restore, switch over to the Restore Options #1 tab and check the Owner and Privilege boxes under Don't save.
- These typically produce conflict when performing the restore and are not needed for running queries.
- These typically produce conflict when performing the restore and are not needed for running queries.
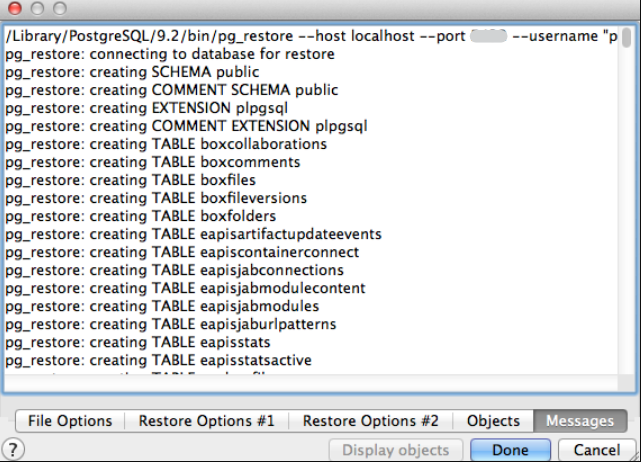
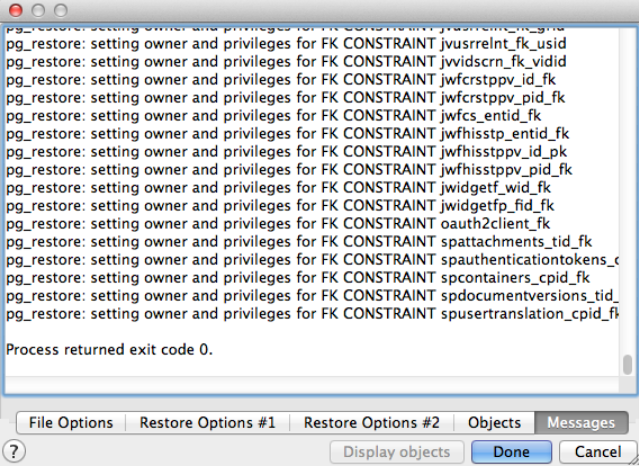
- After clicking Restore, you will see the Messages window, which lists the command and steps taken by the restore process.
- Once you see Process returned exit code 0., the restore has completed, and you can click Done.
Your database is now successfully restored and ready to use. - You can now proceed to query your DB via pgAdmin.


Priyanka Bhotika
Comments