Overview
This article describes how to resolve the problem where a user's profile information (attributes like title, department, etc.) is not getting synced from Microsoft Azure AD to Jive upon login with Single Sign-On (SSO).
Prerequisites
- Ensure that SSO between Microsoft Azure AD and Jive has been configured properly.
- Ensure that LDAP sync is not active (as that might interfere with attributes being pushed via SAML SSO).
Solution
Configuration in Microsoft Azure AD:
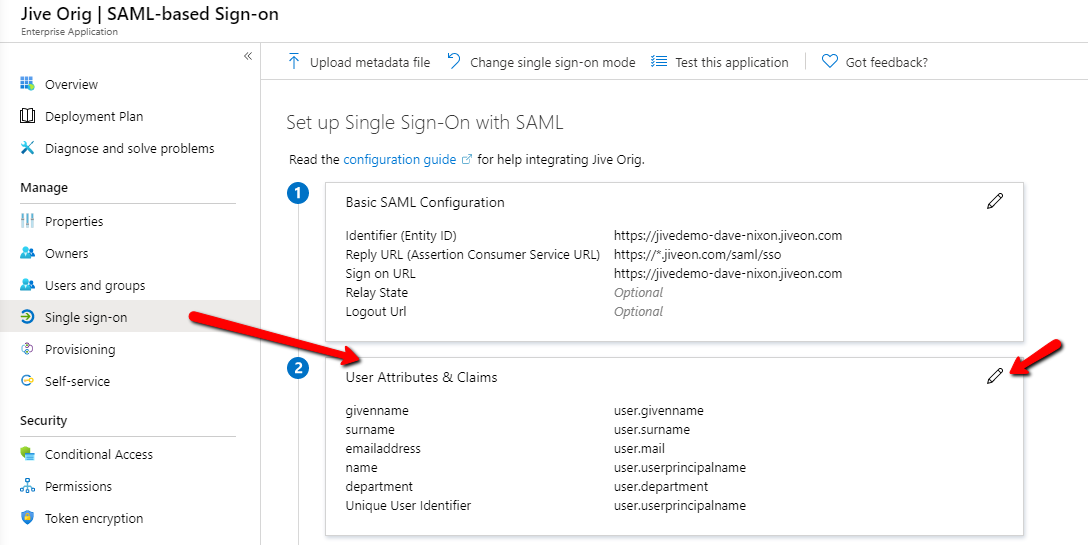
- Inside your Azure SSO app, you will see an entry for User Attributes and claims under the Single Sign-On tab. These are the AD attributes that are used by Jive.
- Click the option to edit the "User Attributes & Claims".
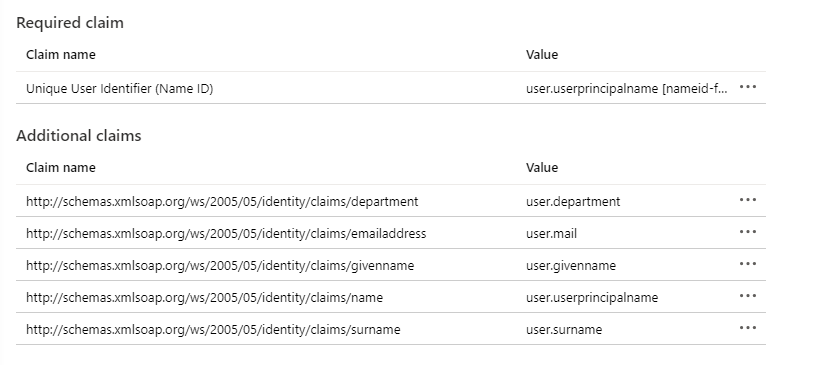
- You can see the existing field values and claim names. The "Claim Name" and "Value" are used to populate the IDP file that is copied into Jive to enable SSO.
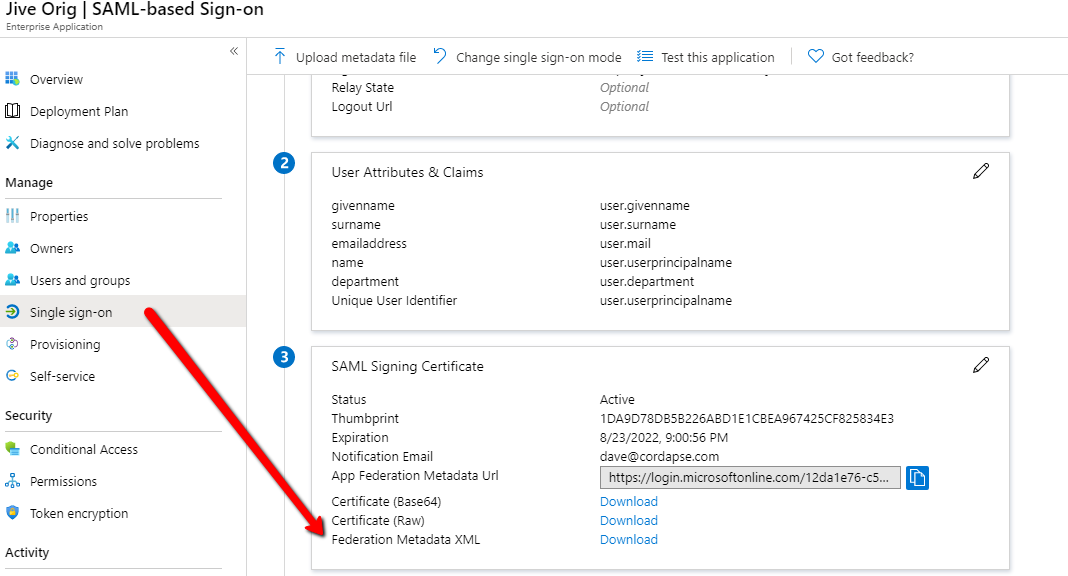
- Go back to the "Single Sign-On" tab. In the section titled "SAML Signing Certificate", you will see "Federated Metadata XML". This is the Azure IDP file that you eventually need to copy-paste into Jive. Download this XML to your local PC.
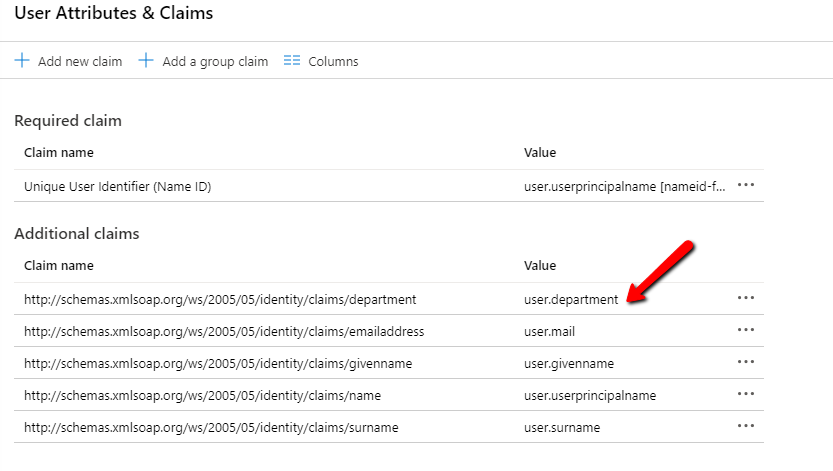
- However, and here is the problem: if you add a new attribute claim and value, the 'Federated Metadata XML' does not get updated.
- In the below example, we have added a new user attribute called 'Department'.
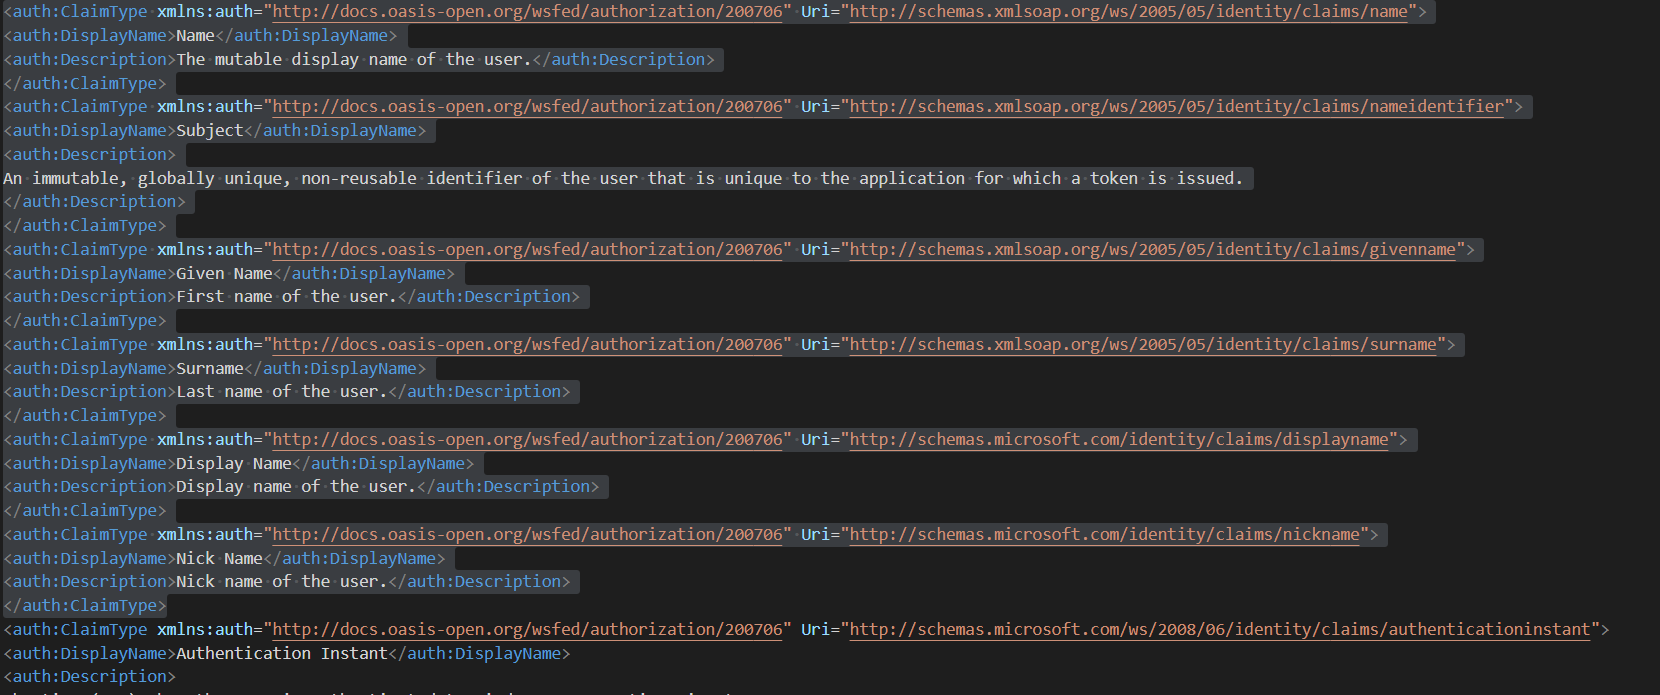
- But looking at the XML file there is no entry for "department".
-
To add this new attribute, we simply add the attribute manually to the XML file, using a text editor. These entries follow a common syntax:
<auth:ClaimType xmlns:auth="http://docs.oasis-open.org/wsfed/authorization/200706" Uri="http://schemas.xmlsoap.org/ws/2005/05/identity/claims/department">
<auth:DisplayName>Department</auth:DisplayName>
<auth:Description>Department of the user.</auth:Description>
</auth:ClaimType> - Note: you can only manually add entries that you have put into the Azure app
- Once you have mapped your Azure app entries and manually added them to the XML file, you can copy and paste the XML contents into Jive (see below).
Configuration in Jive:
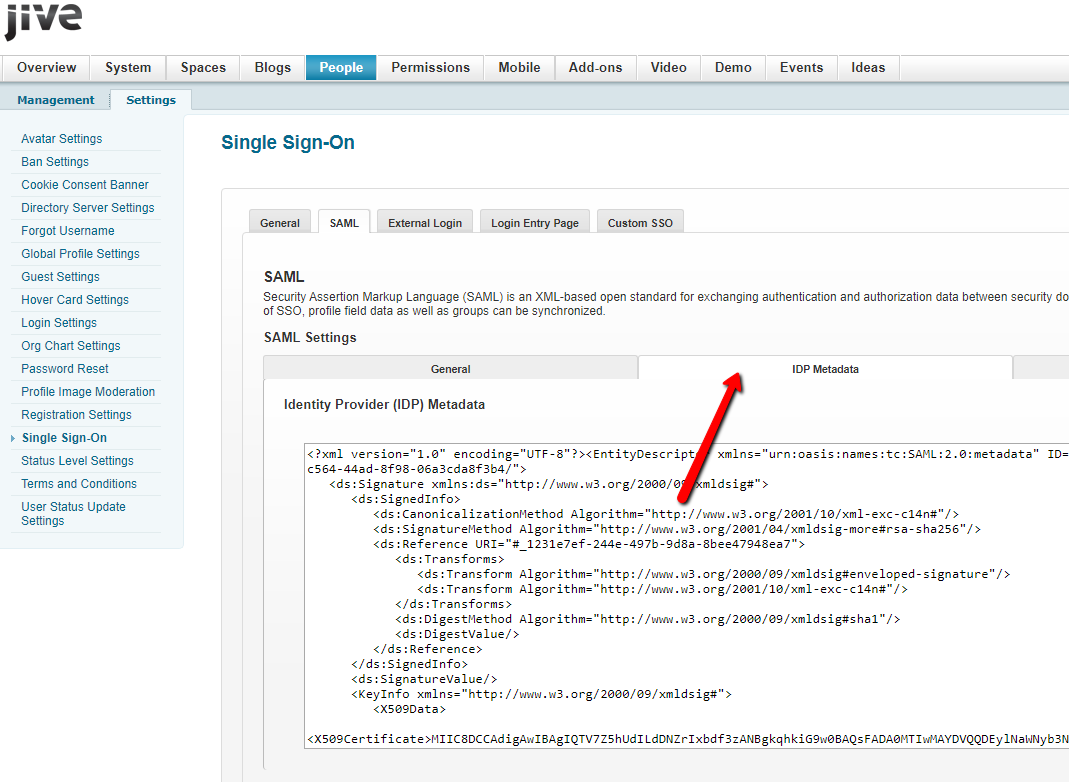
- Open the Admin Console, and go to People -> Settings -> SSO -> SAML. Paste in the updated XML file into the IDP tab.
- Go to the user attribute mapping tab, add an entry for Department, and check the 'Federated' column.
-
The format of the attribute name is the same format you got from the XML file:
<auth:ClaimType xmlns:auth="http://docs.oasis-open.org/wsfed/authorization/200706" Uri="http://schemas.xmlsoap.org/ws/2005/05/identity/claims/department"><auth:DisplayName>Department</auth:DisplayName><auth:Description>Department of the user.</auth:Description></auth:ClaimType>
- Click 'Save All SAML Settings' and the new field mapping is complete.
- Restart Jive
You can repeat this with any of the available fields in AD, such as Title, and map them onto your Jive profile fields
Testing
Upon logging in to Jive using Azure SSO, you will see the Department from AD appear in the Jive profile department field.

Priyanka Bhotika
Comments